by Sharon | Oct 29, 2016
Is it possible for a healthy smoothie to taste like your favorite candy?
Smoothies are popular . . . healthy . . . and sometimes not all that delicious . . .


The whole idea of having a healthy smoothie is to drink it . . . so it has to taste good . . . otherwise it’s healthy without fun. And we all like to have something to look forward to . . . not hold your nose and gulp something down . . . because it’s good for you.
Well, Tyler Cordell, the author of Crazy Candy Smoothie Cookbook: Healthy and Heavenly Smoothies That Taste Just Like Your Favorite Candy puts the fun into smoothies!!
This recipe book has 30 delicious smoothie recipes that taste just like candy . . . Laffy Taffy is one example — Banana or Strawberry . . . and I’m sure you can also ad lib a bit with your smoothie and have both in one drink to tickle your taste buds into a happy taste sensation that is healthy.
For chocolate lovers . . . there’s a Snickers Shake . . . and other chocolate flavored smoothies.
I love the title of this recipe book and the cover picture grabbed my attention.
I immediately thought of healthy treats for the kids . . . and one reviewer of this book mentioned how these smoothies are a substitute for her candy addiction. That’s a good thing, right?
Click the image to the right and you’ll be able to take a look inside this book.
It’s worth checking out!
I was watching some movie the other day and one scene was about a juice bar and how people ordered their drinks . . . some from the menu and others were their own combination . . . kind of like people do with their coffees . . . This got me thinking of looking for crazy recipes for smoothies . . . and I’ll need to figure out the coffees, too. No one likes having a boring drink . . . or food for that matter.
Here are some other crazy cookbooks you may find interesting:


Click any of the images above to be taken on a healthy adventure into good tasting and maybe a bit crazy food and drink recipes. It’s all about enjoying your food and drinks . . . sharing them with friends and family . . .
I’m sure you’ll find something to brighten up your life a bit . . . and find it healthy and nutritional, too.
Thanks for stopping by!
Sharon
by Sharon | Oct 17, 2016
Have you ever thought of something about yourself and then someone else says something similar to what you thought, but in reference to themselves?
Yesterday I was talking with a couple of my internet marketing friends.


Out of the blue he made a reference regarding the direction he wanted to focus with his on-line business.
Everything he said, echoed a similar thought I had earlier in the day about the direction I want to focus my paper crafts.
He’s interested in woodworking and has a website about it, but he hasn’t done a lot with it. He’s busy building websites for others and with his other websites. But last night he stated he was going to focus on that website more and do more woodworking projects.
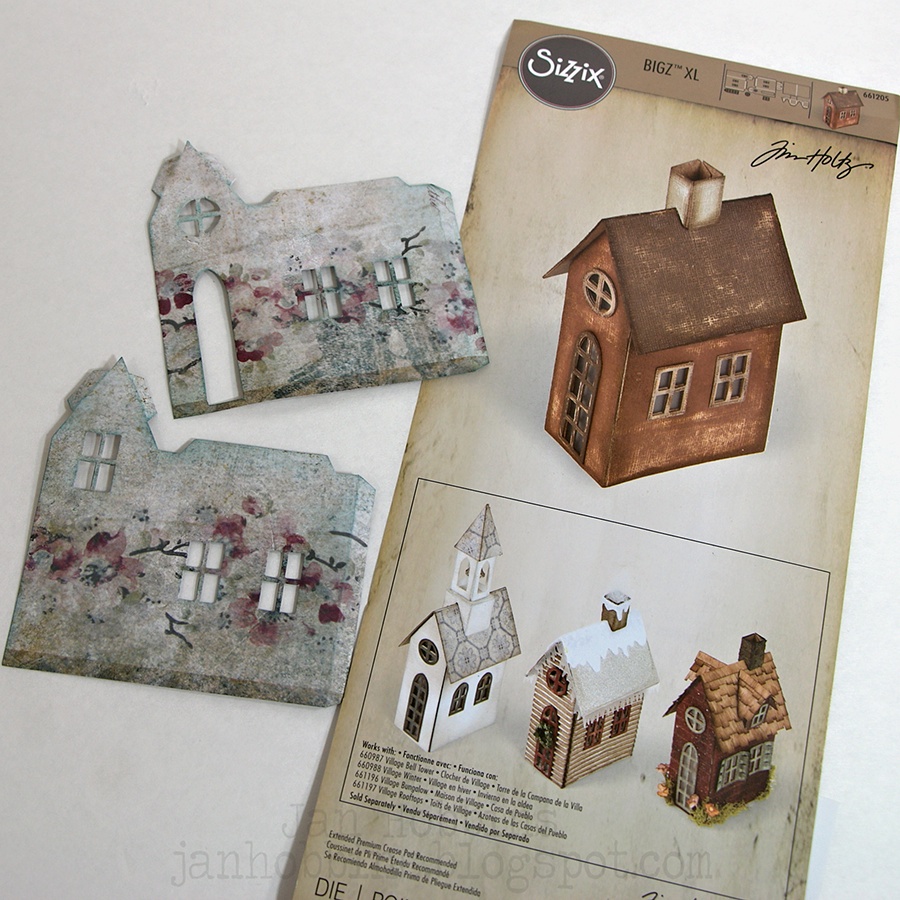
The parallel for me was from the post I wrote yesterday about the Village Dwelling die cut and all the variations that were possible and how Tim Holtz made other die cuts to change the Village Dwelling into a church or with snow on the roof, also changing it to a surf shack, a manor and a bungalow. My thought earlier in the day was about focusing upon making variations of these village pieces. For example, I was wondering how many different ways I could make the surf shack different . . . different roof, siding, setting . . . decorations for different holidays and seasons . . . Maybe make it into a little market place with a restaurant, fish market, vegetable market, ice cream parlor, antique store . . .
Then, I thought, instead of using the Village Dwelling die cut, I’d use the Village Brownstone, it’s taller and has nice windows on the roof. It seems quite interesting. From the image on the right, it can be changed into a church or school, the roof can be changed . . . and you can always change the siding and remove the windows . . . even change the windows and the shutters . . . You won’t need a die cut for this, just paper scissors and imagination.
The Village Brownstone doesn’t have a base, but you can always add one . . . raise it up and make a porch in front with steps . . . you can add a garden to the side . . . or whatever would be appropriate for Halloween . . . could you make it spooky? Have a pumpkin patch in the side yard? Instead of flowers use pumpkins . . . or have a Thanksgiving feast in the side yard . . . Or decorate it for Christmas with trees and snowmen . . . I can see making it into a one room school house . . . or something for Easter with bunnies and Easter eggs . . . Or maybe a fairy tale house with gnomes and woodland critters . . .
I’ve been thinking for quite some time about doing YouTube Tutorials, but never decided upon what I wanted to concentrate upon . . . I’ve always liked making things with a purpose, but cards just aren’t my thing . . . Then I thought about boxes . . . Lots of people are making boxes and designing them . . . Then I thought of these die cut houses and the variations. I’ve always admired the work of Ray O’Bannon of Ravensblight and Ray Keim of Haunted Dimensions . . . And many talented crafters on YouTube who get a die cut and do amazing things . . .
 I don’t know how amazing I’ll be, but there is something to be said about sitting with die cut pieces in front of you and how you decide to decorate them, assemble them . . . add to them and modify them . . . You can make it wider by adding another piece to it . . . add more windows . . . attach another piece to the side of the Brownstone . . . an addition of some sort . . . a greenhouse, perhaps . . . Anything and just about everything is possible . . . Just dream . . .
You could even do things with gears . . . giving it a Steampunk feel . . . or add wings . . .
I was thinking of making a matchbox-type of base for it. This would give you a secret compartment to put some treasures inside . . . or make it larger for a mini-album . . . Those are always popular . . . We always like to have our loved ones pictures close by . . . Or you could have a story about the origin of the house . . . Who lived there . . . and how it came to be part of your village . . . There is always a story to be told . . .
I don’t know how others do it, but I want to give it a try. If you’d like to join me in this venture you’ll need a Big Shot or a Vagabond to use these Sizzix dies by Tim Holtz.
Here are some links you may find helpful”


I thought I’d include some accessories to go along with the Sizzix die cutting machine and the Village Dwelling Die, if you’d like to purchase Tim’s other dies to make the Village Manor, Village Bungalow, Village Surf Shack, Village Winter and The Bell Tower. I think the more dies you have, the more variations you can make. You will need the extended cutting plates and the crease pad for the score lines to imprint on your card stock or chip board.
Thank you for stopping by!
Sharon
by Sharon | Oct 16, 2016
I’m a big fan of Tim Holtz and Sizzix’s Big Shot.


Tim Holtz was the inspiration behind the electric version Vagabond. It looks like a suitcase and you can add travel labels to it. This is an excellent die cutting machine for those who do a lot of die cutting and those with issues with their hands . . . or are just tired of hand cranking the dies through the Big Shot.


One or the other of these machines is necessary to use the Sizzix Bigz Village Dwelling Die by Tim Holtz.

This die is essential in making a village . . . Tim has created other dies that are add-ons to this die . . . The Village Manor, Village Winter, Village Bell Tower, Village Bungalow and the Surf Shack. I think I covered all of them . . . There’s also a Brownstone that I believe is a stand-alone die . . . And there are also dies with different roofs, shutters and windows that you can add to make your dwellings a bit different.

And you can always add embellishments of your own using paper or other materials along with craft store items. It’s amazing how different roof materials and siding can change the whole look of the dwelling. I prefer to make these decisions while the dwelling is still in pieces. That way I don’t need to try to figure out measurements and cutting things at weird angles.
Some people are amazing with paint and paint these up to make them all different with brickwork or rock work or woodwork . . . I’ve known people who cut up paper and layer it to get the correct texture on their dwelling.
This is cute and with the other dies for variations, you’ll be creating a whole village in no time at all!
I found inspiration from the Surf Shack . . . I thought this would be a fun craft for kids who spend a lot of time at the beach . . . surfing and just enjoying the water . . . I’m sure you could make a whole seaside town with restaurants and shops . . . Allow your imagination to flow freely and you’ll be making up whole sections of your village from various places you’ve vacationed or lived . . . or would love to visit.


I’m wondering about something for Halloween . . . Thanksgiving . . . Christmas . . . Easter . . . I think anything is possible once you get the basic house structure and you can create variations upon variations. I like to see what others create and I try to improve on their idea . . . I believe Tim Holtz designed the dwelling house to have fun and see what would develop . . . Then he came up with more dies to add to it . . . Like the Surf Shack, Village Winter, Bell Tower for a church and school house . . . The Village Manor — which would make an excellent Haunted House . . . and the Village Bungalow . . . That one would be delightful for spring or Easter with flowers and bunnies . . . But, it could also work for other seasons, too . . .


Just take a moment to look at the different houses all made from The Village Dwelling and you’ll soon find other houses you can make by combining elements from the other dies.
The important thing is to get the basics down first . . . Then you can design some extra-ordinary dwellings from your own imagination.
Here are some links you may find helpful:


With these along with the images in the post, you’ll have everything you need, except paper, to build villages for every season of the year.
And, if this is your first purchase of a Sizzix Big Shot or Vagabond, it’s a good idea to get the extended cutting plates and a crease pad and other suggestions that go with the machine and with the dies you’re purchasing. You don’t want to wait for your next order to arrive before being able to use your dies.
Thanks for stopping by!
Sharon
by Sharon | Oct 12, 2016
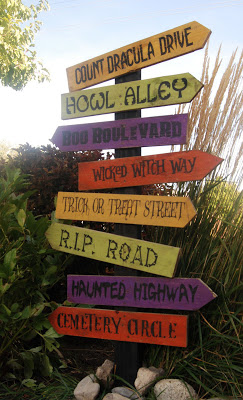
Here’s a great sign you can make and prop up in your yard.
There are always fun projects to do for Halloween.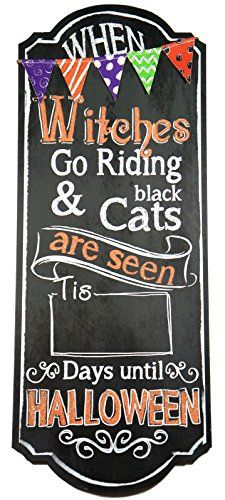
This one isn’t creepy . . . I guess you could make it creepy . . . Add some skeleton bones . . . maybe one of those ugly severed head masks . . . I remember a few years ago I was out taking pictures of Halloween displays . . . I turned around and was face to face with a severed head hanging from a tree. It scared me!!
To make this sign, you’ll need the chalkboard paint . . . or you could put hooks on it and attach numbers . . . changing them everyday . . . and then taking the sign down on Halloween . . . Now, what could you have to replace it?
 I like those directional signs . . . They’re always fun . . . going to Sleepy Hollow . . . Transylvania . . . Amityville . . . Halloweentown . . . Hogwarts . . .
Or other directional signs . . . Elm Street . . . Clown Alley . . . Devil’s Drive . . . Witch Way . . .
Signs are always fun . . . and each year you can add another one to it . . .
I like having something I can make and use year after year . . . I’ve noticed my neighbors use the same Halloween decorations . . . and Christmas ones, too. We don’t have to be original year after year after year . . . Unless we get someone else to do it for us . . .
I like having simple directions to set out and take time . . . and will store easily in the garage . . .
Halloween is a fun celebration . . . Use a bit of imagination . . . and you’ll have a clever sign or two decorate your yard or front porch.
Thanks for stopping by!
Sharon
by Sharon | Oct 11, 2016
That witch in the Wizard of Oz never could get a break . . . now you’ll have a delicious treat in her melted honor.
Halloween is fun . . . and the food can be, too.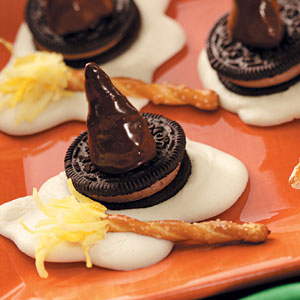
Witch Puddles doesn’t sound all that appealing . . . but with Oreo Cookies and Hershey Kisses . . . It’s a chocolate feast in a puddle.
Here’s the recipe:
Ingredients make about 3 dozen Puddle Witches
- 1 teaspoon water
- 4 drops yellow food coloring
- 1 and 1/2 cups of flaked coconut
- 2 cups semisweet chocolate chips
- 6 tablespoons shortening, divided
- 36 Oreo cookies
- 36 Hershey Kisses
- 4 cups vanilla or white chocolate chips
- 36 pretzel sticks
Directions:
- Place water and food coloring in a large resealable plastic bag.
- Add coconut to the bag.
- Seal and shake to tint the coconut.
- In the microwave, melt chocolate chips and 2 tablespoons shortening. Stir until smooth.
- Let’s make the witches’ hats! Place 1/3 cup of the chocolate mixture in a resealable plastic bag. Cut a small hole in a corner of the bag.
- Pipe a small amount of chocolate on a cookie.
- Dip the Kiss in the chocolate on the Oreo.
- Set on waxed paper to dry. Repeat for the remaining cookies.
- For the puddles, melt the vanilla or white chocolate chips with the remaining shortening. Stir until smooth.
- Place the mixture in a large resealable plastic bag, cut a small hole in a corner of the bag.
- Pipe the mixture into the shape of a puddle onto a waxed paper lined baking sheet.
- Place a witch’s hat on the puddle.
- Place a pretzel stick alongside the hat; sprinkle with tinted coconut at the end of the pretzel stick to look like a broom.
- Repeat with remaining puddles, hats and brooms.
- Chill for 15 minutes or until set.
- Store in an airtight container.
If you’d like, you may want to tint the white chocolate with green food coloring . . . but I think the white works fine . . .
This is a fun project your friends and family will enjoy.
Thanks for stopping by!
Sharon