by Sharon | Mar 23, 2015
Any holiday celebration wouldn’t be complete without free printables from the Disney Family collection. Yes, they’re on board with adorable candy boxes that you can fill with Easter goodies. Let’s see what they have for us.
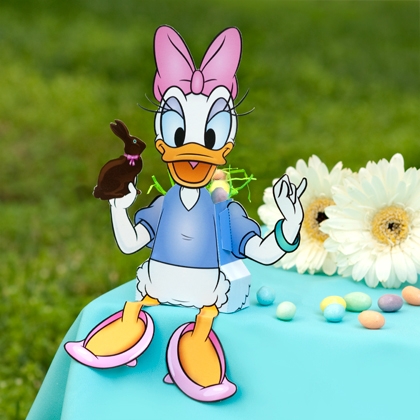
Yes, here is Miss Daisy Duck ready to be filled with Easter goodies.
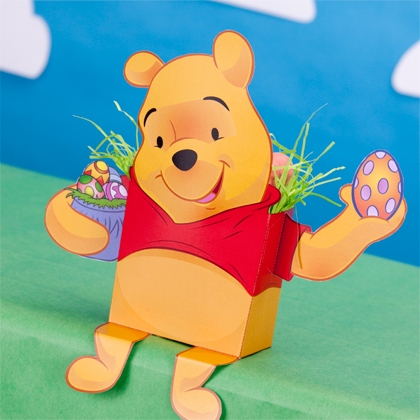
And Winnie the Pooh. Oh doesn’t he look dashing with his paws full of Easter Eggs!
Have you clicked the images above for the free templates you can print out on card stock? Well, if you haven’t what are you waiting for?
Maybe you’re waiting to see what else I have in store for you. Well, let me see. How about:
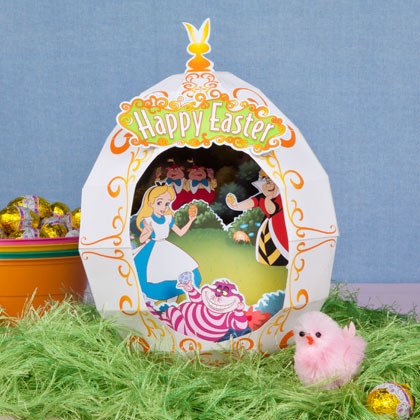
Join Alice on a Wonderland Adventure!
I do remember getting sugar eggs with a scene inside, but this is so much better! This is an excellent craft that makes a beautiful display and also makes a fun gift for your guests. Click the image for the free printable that you can print out on card stock and assemble.
These should keep you busy for awhile. Of course, I’ll have more.
Thanks for stopping by and be sure to tell a friend or two!
by Sharon | Mar 23, 2015
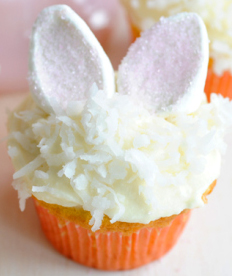
I’ve always loved cupcakes in all flavors. The crowning glory for these cupcakes are the bunny ears. They’re so easy to make. You may have figured it out that they’re marshmallows cut on the diagonal with the freshly cut inner sections dipped in pink sprinkles. They’re placed in frosting with shredded coconut. You may be tempted to add eyes, a nose and whiskers, but in my opinion the ears are enough.
Carrot Cake seems to be appropriate for these cupcakes, but with the coconut added to the frosting, it seems Coconut Cupcakes would be a delicious bunny treat.
Coconut Cupcakes Recipe from http://foodnetwork.com
Makes approx. 24 cupcakes
Ingredients for the cupcakes:
3 sticks softened unsalted butter
2 cups sugar
5 extra-large eggs at room temperature
1 1/2 teaspoons pure vanilla extract
1 1/2 teaspoons pure almond extract
3 cups flour
1 teaspoon baking powder
1/2 teaspoon baking soda
1/2 teaspoon kosher salt
1 cup buttermilk
14 ounces sweetened, shredded coconut
Ingredients for the frosting:
1 pound softened cream cheese
3 sticks softened unsalted butter
1 teaspoon pure vanilla extract
1/2 teaspoon pure almond extract
1 1/2 pounds sifted confectioners’ sugar
Directions:
Preheat the oven to 325 degrees F.
In the bowl of an electric mixer fitted with the paddle attachment, cream the butter and sugar on high speed until light and fluffy, about 5 minutes. With the mixer on low speed, add the eggs, 1 at a time, scraping down the bowl after each addition. Add the vanilla and almond extracts and mix well.
In a separate bowl, sift together the flour, baking powder, baking soda, and salt. In 3 parts, alternately add the dry ingredients and the buttermilk to the batter, beginning and ending with the dry. Mix until just combined. Fold in 7 ounces of coconut.
Line a muffin pan with paper liners. Fill each liner to the top with batter. Bake for 25 to 35 minutes, until the tops are brown and a toothpick comes out clean. Allow to cool in the pan for 15 minutes. Remove to a baking rack and cool completely.
Meanwhile, make the frosting. In the bowl of an electric mixer fitted with the paddle attachment, on low speed, cream together the cream cheese, butter, and vanilla and almond extracts. Add the confectioners’ sugar and mix until smooth.
Frost the cupcakes and sprinkle with the remaining coconut.
Adorn the top with a pair of marshmallow bunny ears.
There you have it. A delicious cupcake that fits the season.
by Sharon | Mar 11, 2015
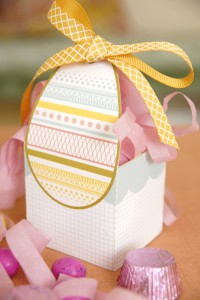
Easter is just around the corner. It will be here faster than you can say “Easter Bunny.” It’s always good to be prepared. That’s why I have this wonderful free Easter Basket printable for you. Print it out on your printer using cardstock, follow the assembly instructions, add a ribbon, tissue paper and some candies and hard boiled eggs and you’re all set! This is great for fund raisers, church functions and family get-togethers. It’s always fun to be prepared.
Here’s the link.
Be sure to print out plenty of these. They make wonderful decorations to brighten up any corner in your house to give it that spring Easterly feel. Young and old love having an Easter Basket full of sweet treats!
by Sharon | Mar 10, 2015
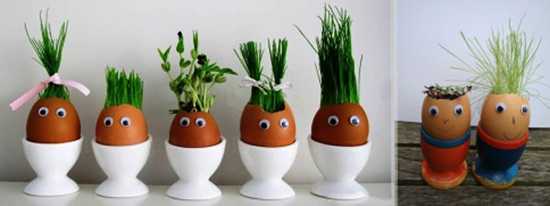
Spring is all about planting . . . and Easter eggs . . . well eggshells at least. These are adorable and would look great on your kitchen window sill. They’d get plenty of light and you’d have fun with these herbs as they begin to grow. Just put some googlie eyes on them and add a goofy expression and you’ll have an original eggshell herb garden to brighten your kitchen. You might as well name them, too.
You can get all fancy with egg cups or use the egg carton, but when you give them as gifts I’d go all out with the egg cups. Just empty out your egg shells and put in potting soil and herb plants. I go with the plants instead of the seeds, but you can begin with seeds.
This is a fun activity for the kids, too.
And I wouldn’t stop there. How about some flowers or succulents?
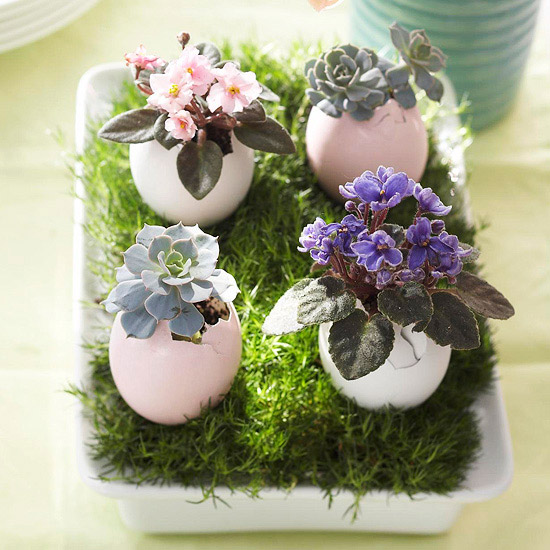
And then there are corks, yes, I said corks:
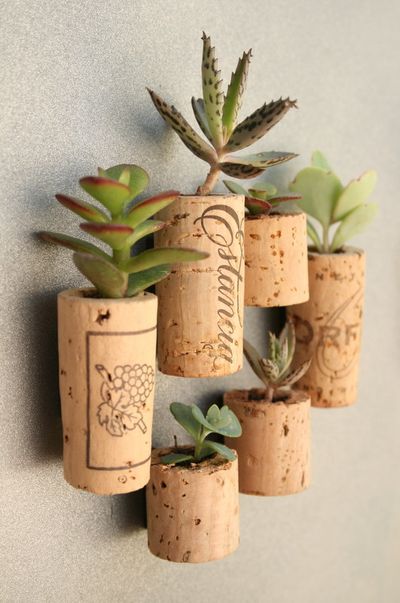
That should be enough inspiration for you. Whatever you can hollow out would work nicely. Have fun and think outside of the box. I’m sure you’ll come up with some wildly creative ideas for planting herbs an succulents.
Thanks for stopping by!
by Sharon | Mar 1, 2015
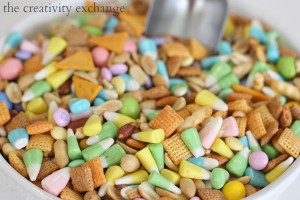
Jump into Spring with this tasty snack you can put together in no time. It’s wonderful to use all the spring candies available in your local market. I’m sure you can figure out the ingredients from the picture, but a recipe is always helpful:
Spring Snack Mix
- Spring Candy Corn
- Cheddar Chex Mix
- Reeses Pieces Eggs
- Cocktail Peanuts
- Pastel Colored Milk Chocolate M&M’s
You can add regular Chex Mix and other candies and nuts of your choice. You may want to add those Cheddar Fishes that are so popular. I like a snack recipe that is just the starting point to creating something fresh and different. You may want to keep it in an airtight container. It would also make a tasty snack you can put in a ziplock bag to add to your children’s lunches or in their backpack for a tasty surprise. It’s also great for an after school treat.This makes a delightful mix of sweet and salty that will give your taste buds a zing.
Thanks for stopping by!
by Sharon | Feb 17, 2015

Image Compliments of http://tablespoon.com
It certainly is amazing what can be done with simple noodles, food coloring and zip-lock bags. Yes, indeed, that’s all you need! I doubt I need to go further with the instructions, but I will just for the fun of it.
You get your bag of spaghetti noodles and cook them following the instructions on the package. Then you get out your zip-lock bags and prepare the colors for your pasta strands by putting 2 tablespoons of water in each zip-lock back and 20 drops of food coloring. Mix it up nicely to get the color you want — more or less drops of food coloring.
When your pasta is cooked, put it in a strainer and pour cold water over it.
You’re now ready to have some fun putting strands of cooked noodles in the various zip-lock bags. Once the bags are full of noodles, zip the bag closed and mix the noodles in the food coloring making sure they are thoroughly covered. Let this set for about a minute before returning the noodles to the strainer.
Once the colored noodles are in the strainer, give them a cold water rinse and return them to the pot where you’re going to mix the colored noodles together.
Serve your pasta however you like. It will be a great hit with your family.
