I’ve been busy with paper crafts and getting ready for summer — spring may be a fleeting memory, but the weather has cooled down a bit.
As usual, my mind has been on fall and winter. Translated, that means Halloween and Christmas.
I do love Halloween . . . but more than that, it is fall that brings life back into me! I love summer, but fall . . . the change of experiencing cooler weather . . . I love wearing sweaters . . . there is something about pumpkins and scarecrows . . . harvesting your garden . . . even though some crops you’ve been enjoying.
There’s just something in the air.
But . . . I’m off topic . . . Pocket Letters . . . The original idea was sending letters to pen pals . . . yes, I’m talking about snail mail letters.
Here’s a video that will explain the concept:
Now, this is lovely . . .
I was thinking of this for family and friends. They would work for all occasions . . . birthdays, holidays, celebrations . . . just thinking about them and wishing them well. We do enjoy receiving personal letters in our mailbox. Maybe that’s why I order online . . . to receive packages at my door. Sure, I can go out shopping, but there is something about shopping online and that anticipation of having it delivered to your door.
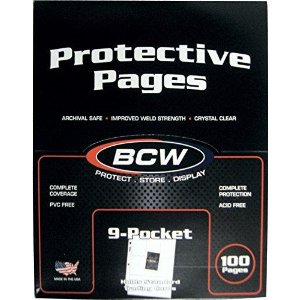
You will need your craft supplies plus these 9 pocket protective sleeves. Just click the image to the right.
This is a great buy for 100 protective sheets that you can put in a note book. You can use them for coupons and whatever “treasures” you collect and want to save. You’ll also have plenty of these to send to your family and friends so they can try this little craft and send you their very first pocket letter.
These pocket sheets would be great to show off the stamps you have . . . as well as a reminder that you do have them.
And they would be lovely for the extra die cut flowers and holiday die cuts you’re saving. I usually cut out more than I need and now I’ll have a way of organizing them.
You may even want to join Janette’s group she mentioned in her video. It is up to you what you decide to do. It may be fun to meet other crafters or bloggers or those who share similar interests. It’s all good, whatever you decide.
Here’s a nice spring video by one of my favorite YouTube crafters:
Now, isn’t that lovely how she did that.
I do enjoy her work and this is what motivated me to get stamps, dies and inks, etc. in order to create some of these I can send to friends and family. And also, for me to keep samples of some of my creations — some pictures will fit in . . . along with clip art I’ve saves along with ephemera.
Here are a couple of helpful links you may enjoy:
Click either image above to go where you can shop for whatever your heart desires. It’s all secure . . . it’s Amazon for goodness sake! I do, however, receive a small fee for the purchases you make from using one of my links. The beauty of it is that you don’t have to buy what I suggest — just shop for what you want . . . and I’ll receive my fee. (So buy something expensive — just kidding 🙂 )
I hope this was motivational for you. Pocket Letters are a lovely way to meet people and a means of keeping in touch with family and friends.
This powerful 7″ IPS display Tablet is at an incredible price.
If you’ve been toying with the idea of getting a Fire Tablet, now is the time to jump on in.
It now comes with the Alexa cloud-based voice service that you just press and ask. You can enjoy movies, TV shows, music, Kindle eBooks, apps and games.
Prime members get unlimited access to a large selection of music, books, videos and more.
The battery life is up to 7 hours.
The Fire Tablets were built for entertainment. Now with Alexa, there is absolutely no limit to the amount of fun you and your family with have with this outstanding tablet.
Click the image to the right and discover what Fire Tablets are all about.
I can tell you all day long the great things about this product, but you need to see for yourself. So, click the image to learn more.
Let’s have some fun with your Easter Egg decorating.
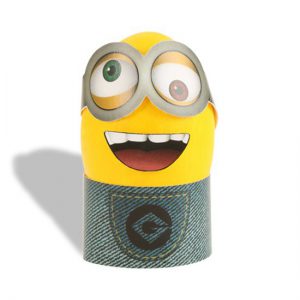
How about dressing your eggs to look like Minions?
And creating your own Minion in the process . . . Sound like a good idea?
Change up the eggs and the mouth — add hair and go a bit crazy with different ways you can create a minion of your very own.
I have a PDF of the various parts, hair, eyes, mouth, overalls that you can print out on your personal printer, cut out and allow the kids to have some fun. Just click the little minion on the right.
But, this is only the beginning! Add some bits and pieces of colored card stock and design different hair styles and a different outfit than overalls. Use your imagination and allow the kids to get into this activity as well.
I know it’s last minute, but most of us die our Easter eggs the night before . . . but you may have them already done. Just play with some of the yellow ones . . . or get some plastic eggs and dress them up — after you fill them with sweet treats.
I thought it would be a bit of fun!
But look what I’ve found!!!
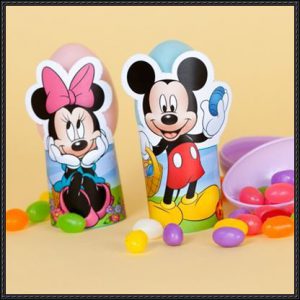
Disney’s Mickey and Minnie are always a favorite.
Click the image to the left to be taken to the PDF to download and print out, cut out and wrap around your Easter Eggs.
Now, you have a bit of a decision to make . . . create your own minions or use these Mickey and Minnie wrappers . . . or maybe do both . . . or put Mickey ears on your minions . . . or Minnie’s bow . . . or Mickey’s pants . . . You may be able to have a bit of fun with these. I’m sure you can think of other variations that would work well with your creative endeavor.
You can get some plastic eggs and let your imagination soar.
You can go shabby chic or bling them up however you like. Just gather up a variety of odds and ends and have at it. Add flowers and lace . . . get images and decoupage them.
It is possible to create lovely eggs to give as gifts or decorate around your house. A few of these would definitely brighten up different areas of your home.
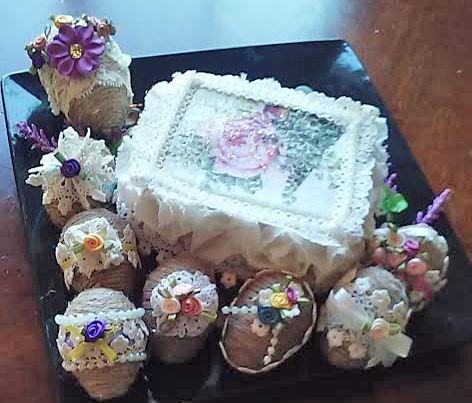
Isn’t it clever of Heather to use the egg carton, trim it with lace and decoupage a lovely picture on both the inside and outside of the lid and add a lovely lace ruffle around the image (both inside and out).
I would personally find it difficult to put these away after Easter. I think they would look lovely throughout the spring and into the summer.
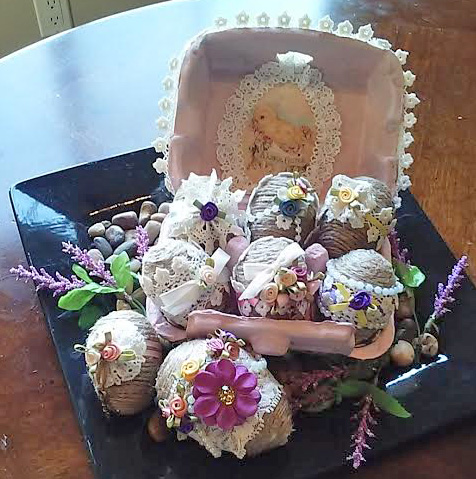
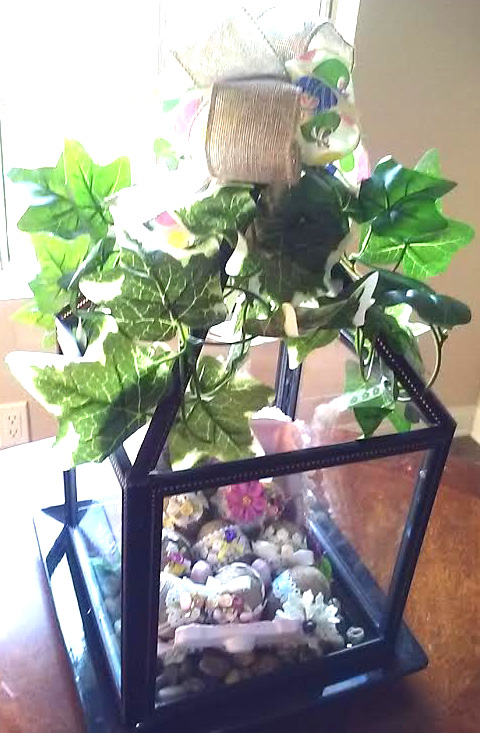
And, Heather did a wonderful job with a lantern in which to display the eggs.
I’m inspired to get to work. How about you?
As you can see, the eggs appear to be wrapped initially in twine and from there Heather went to work with pearls, flowers, lace, ribbon and whatever bits and pieces she found to make each and every one of her Easter eggs into a breathless work of art.
You can do the same . . . and for the lantern . . . get some picture frames together and create to your hearts content to create the right shape you desire. Then add the greenery and some burlap lace and you have a lovely display case for your treasured crafts.
With a little bit of inspiration . . . you’ll be amazed by what you can make.
My personal thanks to Heather for sharing her Easter craft projects with us.
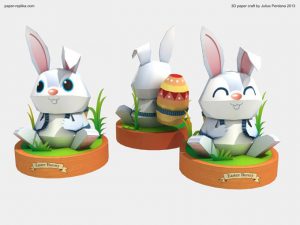
This happy Easter bunny is a great craft for you to do — you may have just enough time to make a few for family and friends.
I love how these 3D models are created and then put in PDF form in order to share with others.
Paper-Replika.com is the source for this adorable bunny, The PDF comes complete with all the pieces you’ll need to make one of your own. You can, of course, add your own embellishments to make it more personal for you or for the person who may receive it. I think it’s fine the way it is, but for those who live on the beach, it may be fun to add some shells . . . you can add flowers and maybe some little trinkets to bling it up a bit. The finishing touches will make it unique and more personal.
I do like it and recommend that you click the picture to the right to be taken to the Paper-Replika website so you can get to the PDF to print it out and assemble.
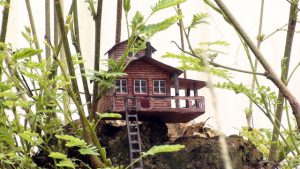
Since my printer is on the fritz right now I’ll have to wait for my replacement printer, but I’ll be sure to print this out as soon as my new printer is set up. But, just in case it isn’t, I did a bit of looking around and I found this great Tree House. I don’t know about you, but a tree house has always been something I wanted to have. Now since I won’t be building one to use in my backyard, I thought a paper craft one would be fun to have.
You can click this tree house picture to the left and be taken to the Paper-Replika website where you can download it.
I do like the way Julius Perdana, the creator of these paper crafts, put the tree house in a wooded area with rocks. It does look like a cabin in the woods and a tree house seems to be a natural for that setting.
As with the bunny paper craft, you can add your own finishing touches to this tree house to make it fit your ideal — or the one you did have as a child or the one you will make for your children in your own backyard.
Well, bunnies, tree houses and spring all seem to go together. I do hope you’ll visit Paper-Replika and take a look around. I’m sure you’ll find something you like.
Thanks for stopping by and my personal thanks to Julius Perdana at Paper-Replika for these great paper crafts I found.