by Sharon | Sep 10, 2015
For Halloween, it’s great to have fun nutritious lunches and snacks for the kids.
Everyone would love to have one of these sandwiches! So why not make up a platter of them for your Halloween Party!!!
Now, normally, you’d attach toothpicks to the olive “eyes”, but for a school lunch, I’d prefer to attach them with something edible. I’d go with pretzel sticks. And, I’d do the same for the party platter.
As you look at the picture . . . they are a lot of work with the cutting of the bread and the cheese . . . but they definitely add to the Halloween theme of your sandwich platter.
When you get down to it, it’s fun and it’s about having fun . . . tell me about it after 100 sandwiches . . .
In the end it is all worth it when you receive the compliments and see them being gobbled up . . . wanting another platter of them.
So, this time you bring out a platter of bread, condiments, cold cuts, cheese, olives, pretzel sticks — see how many people will cut their bread into a circle and make their cheese look like spikey teeth. You’re going to have them make themselves a sandwich!!! A real sandwich with olives and pretzel sticks on the side. So, you got to be the great hostess and then feed the hungry crowd . . .
You can have other things besides sandwiches, but those will come as the season progresses. It’s just that sometimes “finger food” isn’t enough to satisfy an appetite. How many times have you gone into the kitchen to make a sandwich after a party? Oh, yes you have!!! Admit it!!!
These are cute sandwiches and fun for a kid’s lunch — maybe two would be good. Very few monsters travel alone.
Have fun!!! Please leave me a comment below.
Sharon
by Sharon | Sep 8, 2015
I’m all into fall decorating and this witch hat is an excellent place to begin.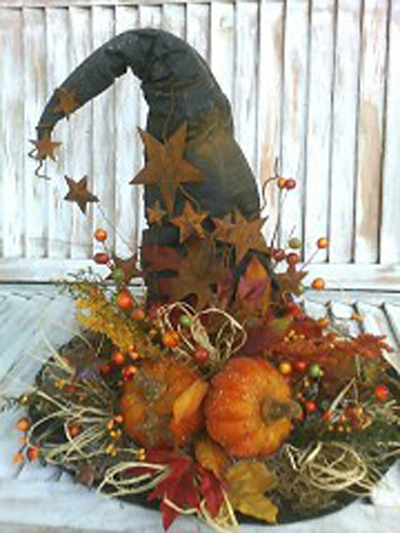
You can check out any left over items from last fall that would be excellent to decorate this hat for your table.
I love the rustic natural feel of the decorations. I have some small plastic cauldrons I’d add plus maybe a frog and a black cat.
It may be a good idea to put batting or tissue paper inside the witch’s hat to keep it standing up. The stars are a nice touch.
I’m sure you have dozens of ideas and items you could use to decorate your witch hat and proudly display along with the party food.
This hat truly needs a party!!
I’ll try to attach a witch’s broom to the display to let your guests know the witch is home for the night.
Have fun!!!
Please leave me a comment.
Sharon
by Sharon | Sep 6, 2015
Here’s a great Fall project that will get a whole lot of attention when you put it in your front yard.
I like starting the season with fun projects. It’s excellent to be able to make these plastic pumpkin planters and fill them with flowers or herbs. These do have personality.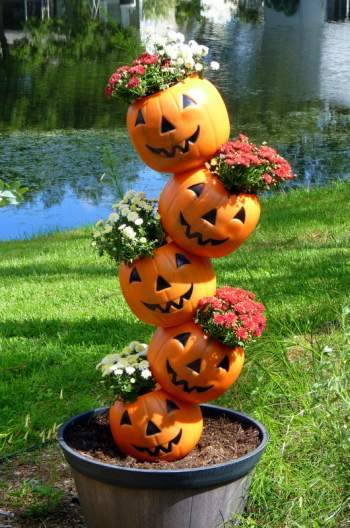
Basically, what you see is what it is and how to make it. I can give you some basic tips, but you may already have an idea of how you’d like to create your own DIY project.
As I said, these are plastic pumpkins. You can make the face you want on them and drill a hole in the bottom of each pumpkin for drainage.
To keep these beauties in place, you’ll first need to put a long stick into your planter pumpkin pot and one-by-one decide how the pumpkins are going to be stacked, allowing plenty of room for the flowers or herbs to grow and be beautiful. You will be doing a lot of drilling holes in your plastic pumpkins to get their placement just right on the stick or stake.
I was thinking this would be fun to set up, on a smaller scale, for a party centerpiece for your table minus the dirt in the planter pumpkin pot. There are plenty of variations you can do with this great idea.
For indoors you could use twist ties to attach the pumpkins to the stick and have them for your guests to take home with goodies packed inside. You could even add names on the back of them.
I do like this idea for the yard, but it’s always fun to come up with variations for indoors as well. I’m sure you’ve come up with a few ideas of your own.
As with all DIY projects, have fun and allow your imagination to soar.
Thanks for stopping by and please leave me a comment with your thoughts about this project and what variations you’ve dreamed up.
Sharon
by Sharon | Sep 4, 2015
It wonderful to get into fall and all the projects you can do to decorate your home.
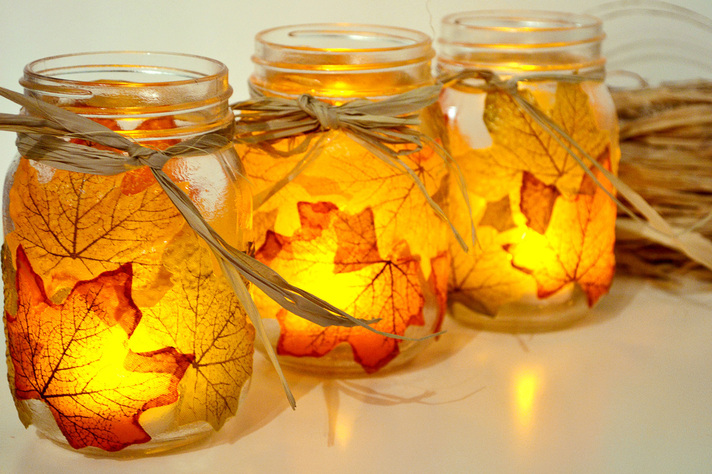
These fall candle jars are easy to make and fun to use.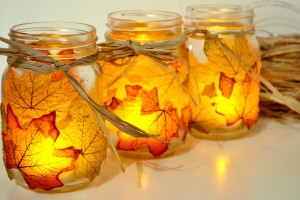
You can use any jars you’ve saved or use mason jars. You’ll need Mod Podge and fake leaves. I like the fake fall leaves because they absorb the Mod Podge.
You apply the leaves to the outside of the jar and add a rafia ribbon to give it that finished look.
I started this project in the center and brushed Mod Podge to the outside center of the jar. Then I positioned a leaf and brushed Mod Podge over it. I overlapped the leaves. Be sure to have Mod Podge on both sides of the leaves.
This is a fun project the kids may enjoy, too.
You can use a tea candle inside the jar or an electric candle light. The light should glow through the leaves. I don’t cover every inch of the jar. I like having some of the glass showing. Make your however you like.
Thanks for stopping by. I hope you found this fall candle jar interesting enough to make.
Please leave me a comment.
Sharon
by Sharon | Sep 2, 2015
These Vintage Recipes Are Great!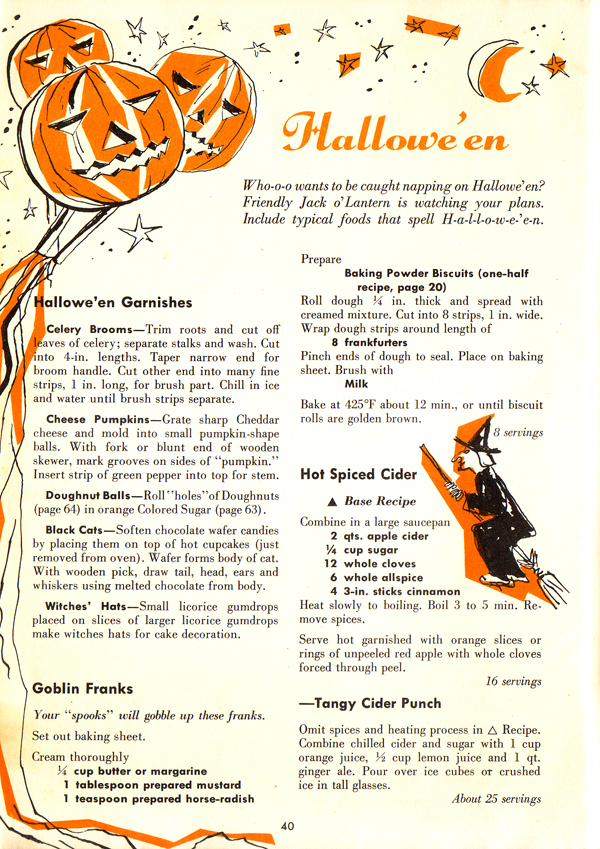
Well, let’s see what else I can add. I’m truly excited about getting into the Halloween Spirit!!!
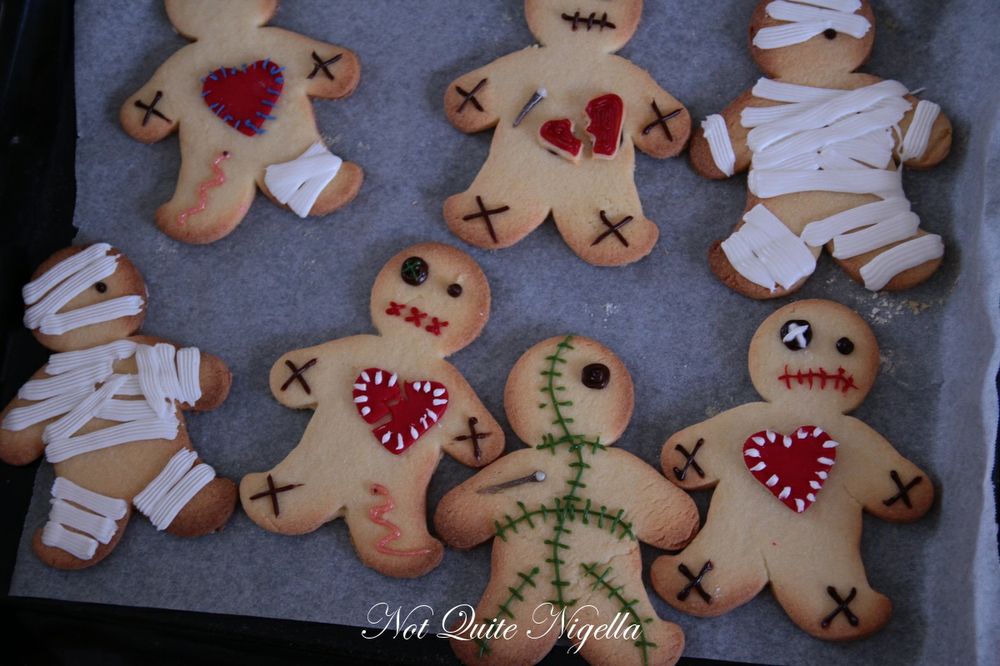
Oh No!!! Not Voodoo Sugar Cookies!!!! Oh yes, I do believe so!!!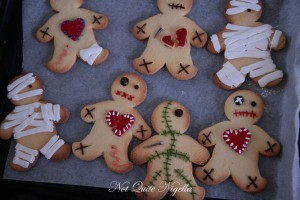
Just use your favorite cookie recipe — could be sugar cookies or any cookie flavor variety of your choice. You’ll need a large gingerbread man cookie cutter and then bake according to package or recipe directions and decorate with the kids using all kinds of those squeezable frosting tubes. And you can use some candies, too. It should be a fun afternoon creative session.
Check out the picture to get your creativity into gear. You could do the voodoo thing or the zombie thing or whatever Halloween thing you and your kids can imagine. Looks like we do have a couple of mummies. These are quite frightening, but you can cute them up a bit or make them really scary.
by Sharon | Aug 31, 2015
 I absolutely wasn’t going to jump into Halloween!
Then . . .!
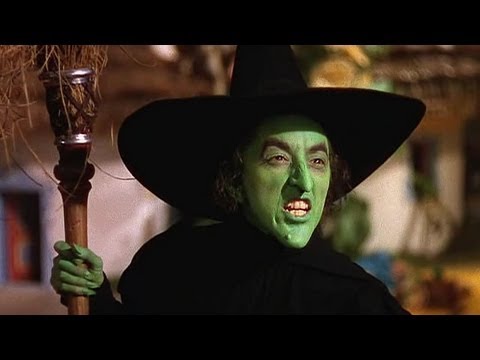
I thought of The Wicked Witch of The West from the Wizard of Oz and then I saw the picture below and 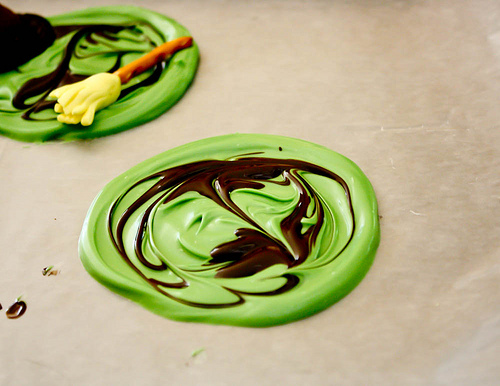 these Melted Wicked Witches of the West were born! It is such a fun concept. The kids will eat them up!! This will truly be the highlight of any Halloween Party for kids as well as for adults. Remember the line: “I’m melting, I’m melting!” Oh yes, indeed!!!
You can make the Wicked Witch goo by melting green candy melts and dark chocolate candy melts separately in the microwave.
You won’t need much of the dark chocolate candy melts. A bag of the green candy melts made about 2 dozen of these melted wicked witches and as you can see from the picture, you just need to drizzle the dark chocolate in to make it look interesting — maybe give it a gentle swirl.
Do you see the witches hat and broom? You’re going to want to make those first before melting the candy melts. I guess I better stop dreaming about these gooy witches and get down to business.
Ingredients for the Melted Wicked Witches of the West Food Craft Recipe:
- A bag of green candy melts for 2 dozen of these beauties
- A bag of dark chocolate candy melts to drizzle into the green globs and to attach the kisses to the Oreo to make the witch’s hat
- A bag of pretzel sticks for the broom handles
- Yellow Laffy Taffy
- Oreo Cookies
- Hershey Kisses
To make the wicked witch’s hat you’ll need half an Oreo cookie and stick a Hershey’s Kiss on the non-filling side of the cookie. These you can make after you melt the candy melts and made your green gooy globs on a large cookie sheet covered with wax paper. I’d go with a little bit larger size than a regular cookie — maybe a cookie and a half size — especially if you want to put these in ziplock bags for Halloween Party Favors.
To make the witch’s broom you’ll flatten the yellow taffy and cut it in half horizonally, then cut the the broom fringe with sharp scissors and attach the non-fringed side of the broom bristles to a pretzel stick.
All right, you got your brooms made, right? You’ve melted your green and dark chocolate melts in separate bowls, right? You put wax paper on a large cookie sheet, right?
Let the assembly begin!
Spoon a nice generous amount of green candy melts onto the cookie sheet, trying to keep it in a neat circle. Drizzle the dark chocolate into the green goo and give it a swirl with a toothpick or butter knife. Separate an Oreo Cookie and put the frosting side into the green goo to the left edge. Add an unwrapped candy kiss dipped into the melted dark chocolate candy melt and attach to the center of the Oreo Cookie. Now put your pretzel broom into the green goo to the right. There you have it!
Continue the process until all of your Melted Wicked Witches of the West are complete and set in the refrigerator to cool.
I’m sure you’ll get the feel of making these in no time. You could be making quite a few of these once you get started. Have fun!!!
Sharon
In case you’re having difficulty finding the ingredients, here are some links:


Thanks for stopping by!