by Sharon | Jun 9, 2015
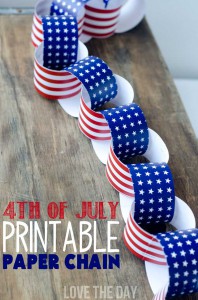
Click Image For Free Printable Link
I absolutely love making paper chains. This 4th of July Free Printable Paper Chain is great for other patriotic holidays, too. It’s going on my fireplace mantle. It will truly dress it up.
Get the kids involved . . . your paper chain may be much longer than you ever expected. It will come together quite nicely. You’ll be able to decorate your whole patio . . . excellent for your BBQ celebration!
The thing is, you can leave it up all summer long. And even into the fall when we have Veteran’s Day. I may use it as garland for my Christmas Tree this year. It’s a simple way of showing how much you love the United States of America. It doesn’t have to be for special occasions — it can be all year round.
Have a great 4th of July!
by Sharon | Jun 8, 2015
It’s just about that time of year when we celebrate America’s Independence!
I saw this image on Pinterest and had to give it a quick look . . . basically what you see is what you have.
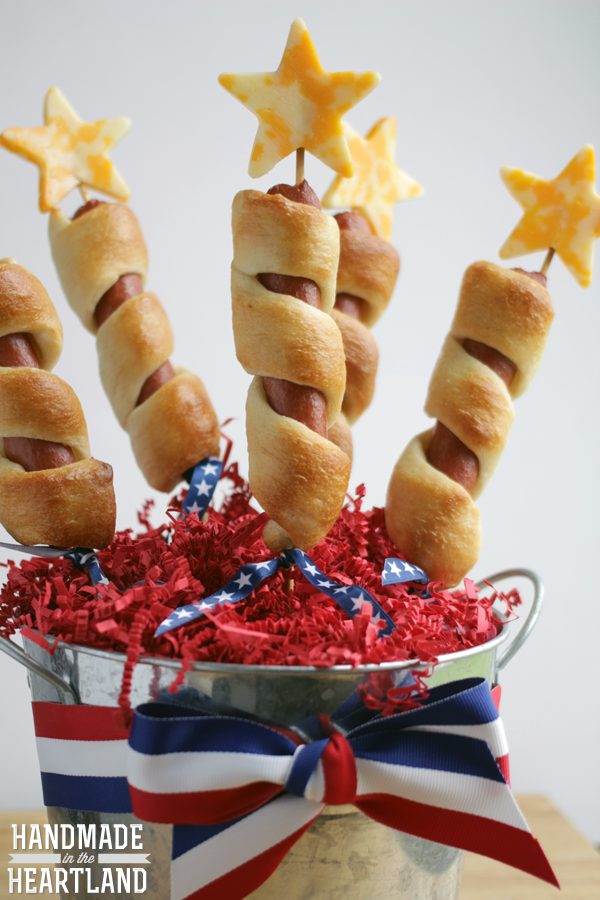
Recipes with pictures are much more exciting than words, but, of course, I’m going to tell you all about it. These images from Handmade in the Heartland show the finished product and the beginning process. It is an impressive way to make patriotic hot dogs for the 4th of July. Your guests are going to flip over these!
What You’ll Need To Buy:
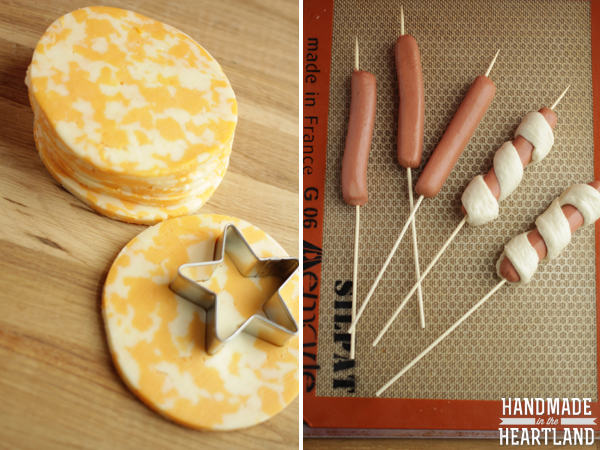
- Thick slices of Colby Cheese Slices or any cheese of your choice from your favorite deli where you can get it sliced — you want your slices to be 1/4 inches to 3/8 inches thick.
- Star Cookie Cutter — large for the star on top, but also a small one for little stars to use for extra cheese to decorate your plate.
- Wooden Skewers
- 1 can refrigerated bread stick dough
- 1 or 2 packages of hot dogs of your choice — depends upon your crowd
Bringing It All Together:
- Carefully push your wooden skewers through your hot dogs — you want it to go all the way through so you can have room to place your cheese star on top. These skewers are long, so you’ll have plenty of stick for handling and giving your hot dog a look of a fire cracker.
- Take a piece of bread stick dough and carefully wrap it around your hot dog starting at the bottom and winding your way up the hot dog — making a nice spiral.
- As you have probably guessed, these don’t go on the grill, but are put in the oven following the baking instructions on the bread stick dough can. Before baking, put them on a nonstick cookie sheet — you may want to also use parchment paper to line the pan, but you don’t have to.
- While your wrapped up hot dogs are baking, cut the stars out of the cheese.
- After your hot dogs have cooled, put your large cheese stars on the skewer at the top of your hot dog.
- They’re impressive to put in a nice bucket with red, white and blue confetti paper with a nice chunk of styrofoam hidden under the colorful paper. Presentation is very important — this will truly wow! your guests.
- I’m sure you’ll find a use for your left-over cheese . . . those cutter cutter scraps could be melted into a cheese sauce you can use for dipping your hot dog into . . . or to make some nachos . . .
I hope this recipe brings some joy to your 4th of July celebration.
by Sharon | May 12, 2015
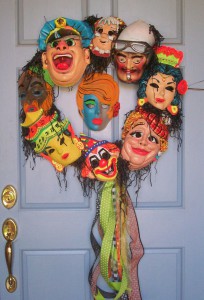
It’s truly amazing what you can find at Thrift Stores or after the season sales. I know, too much junk and clutter, but you can put it to use by making holiday wreaths.
You can make them up and sell them. You wouldn’t believe how many times someone has knocked on my door wondering where I bought my wreath. When I tell them I made it, they immediately ask if they can buy it.
I do keep a running tally of what it costs for me to make my holiday wreaths, so when the opportunity arises for me to sell one, I multiply my cost by 5 and I have a price — and sometimes I jack it up quite a bit . . . you don’t want to sell your talent too cheap.
I usually sell my wreaths from $25. and up. Sometimes I get things for nothing. Some people at garage/yard sales give away a lot of stuff by the box. Just be sure to look for stuff in the off season for the best bargains.
Have fun finding trash that you can make into a fun front door wreath.
by Sharon | May 11, 2015

This is truly a yummy idea for Memorial Day! It’s an excellent way to celebrate and honor all the brave soldiers who fought for our freedom. It’s also an excellent idea to use for Flag Day (June 14), the 4th of July, Veterans Day and all the wonderful American holidays that come around throughout the year.
I do have a recipe for you, but this is more of a technique. I enjoy anything that makes my baking projects easier. I think you’ll enjoy this.
First, the picture. You can learn so much more from a picture than the yackity-yacking of a description.
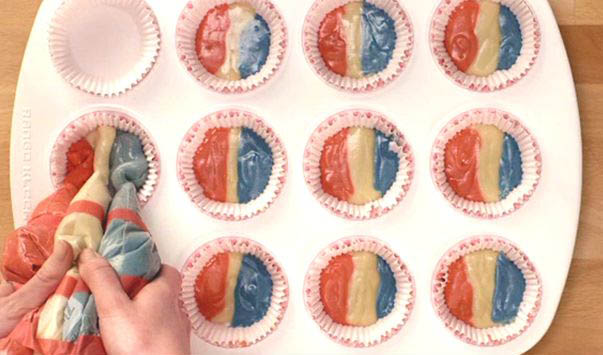
You see!! What did I tell you!! Now you can see why I’m so excited about this patriotic cupcake and why I call it more of a technique than a recipe. I know you’re way ahead of me in making other color combinations for other holidays and celebrations.
It’s now time for me to get this recipe going with ingredients and directions.
Ingredients:
- Boxed White Cake Mix or you could make it from scratch
- Red Food Coloring
- Blue Food Coloring
- 3 Quart Size Ziplock Brand Bags
- 3 Twist Ties
- Masking Tape
- Vanilla Frosting
- Red, White and Blue Sprinkles
Directions:
- I’d begin by reading the box instructions. Preheat the oven as directed. Get out the muffin tins and line them with the cupcake liners. Now mix up the cupcake batter. If you made your own cake mix, you know whether to preheat the oven and already have the muffin tins lined with cupcake liners. And you’re mixing up your batter.
- Divide the cupcake batter evenly into three bowls. In the first bowl add 10 drops of red food coloring and stir until the color is thoroughly combined. In the second bowl add 10 drops of blue food coloring and mix until the blue color is thoroughly mixed in the batter. In the third bowl, you’ll have your white batter.
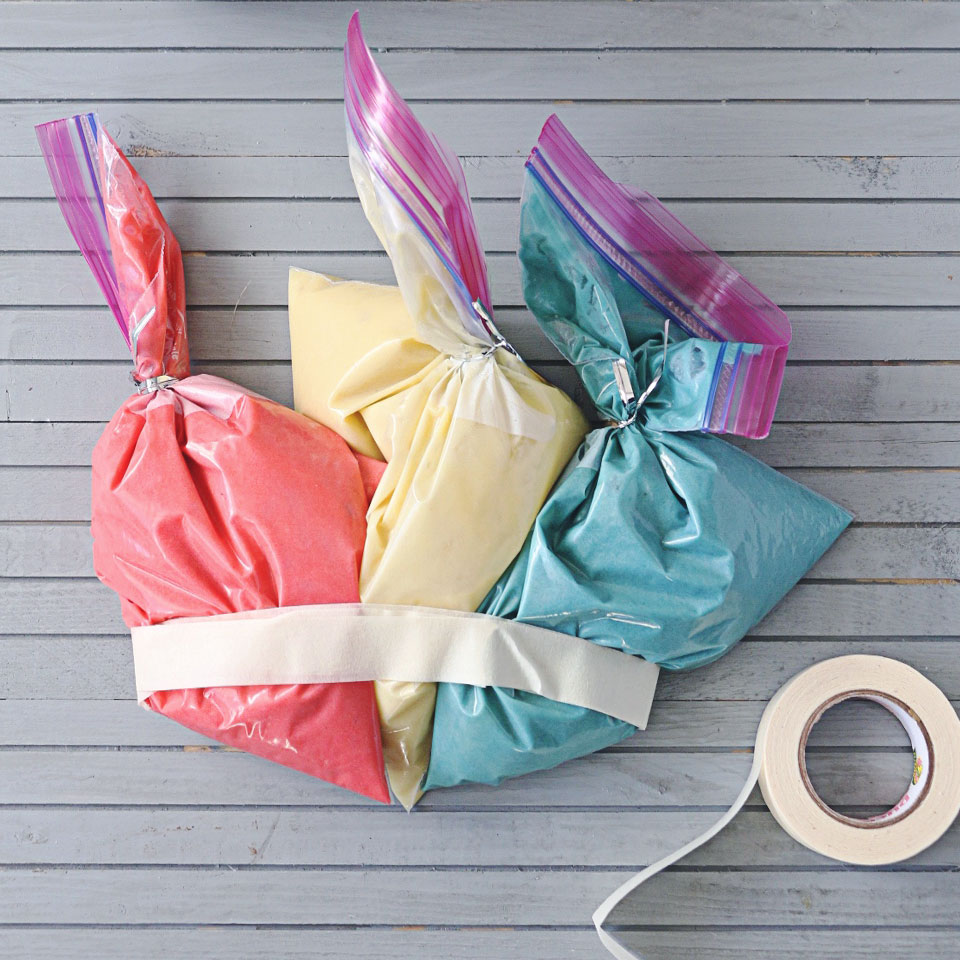
- Get out your three Ziplock Bags and place the batter in the first bowl in one Ziplock Bag. Then put the batter from the second bowl into a fresh Ziplock Bag. And the third Ziplock Bag is for the third bowl of batter. You now have three bags of batter.
- Tie off each bag with a twist tie. You want them to look like triangular piping bags. This may get a bit confusing so read carefully: Gather the bags together in a straight horizontal row and position them so the bottom tips touch. (You probably already did this, but I would arrange them in order: Red, White and Blue.) Secure all three bags together at the bottom by wrapping masking tape around the bags, creating one large piping bag.
- Here’s a picture in case you got a bit confused:

- You’re going to now want to carefully cut the bottom tips out of the Ziplock Bags. You will want them to be as equal as possible so when you squeeze, you’ll get even strips of red, white and blue. I guess I don’t have to tell you, but I’d hold the bags up so the batter isn’t in the tip I’m cutting off. Then I’d very carefully turn the bags over and squeeze gently in a cupcake liner. It may run out quite freely so be ready to lift up your batter bags. You don’t want to overfill the liners. It is amazing when the batter flows out evenly to make your red, white and blue batter stripes.
- After baking according to the box directions. Let them cool before adding the frosting and the sprinkles. Since you were so good with the piping bag technique for the batter, you may want another Ziplock Bag to use for the frosting.
This is a great recipe technique that may take some practice. I like using this technique when I’m making regular muffins and cupcakes. I don’t have the drips and mess.
Have fun!
Thanks for stopping by!
by Sharon | May 9, 2015
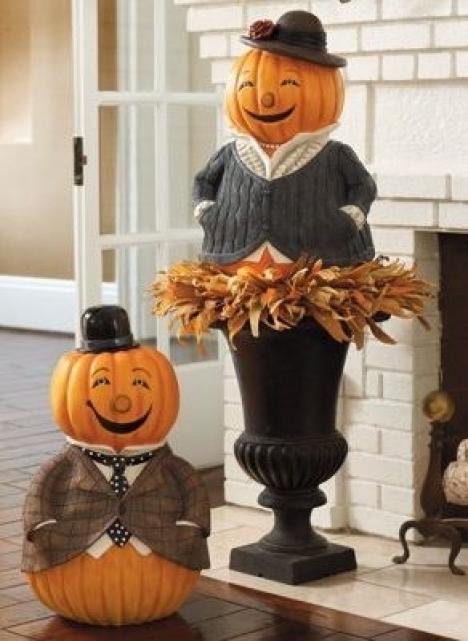
Too often scarecrows are associated with Halloween, but there are plenty of gardens and fields that have a scarecrow displayed to keep the crows from feasting on the crops. I do love scarecrows. They could be compared to the winter snowman, that I also adore. It’s all about how to dress them up. And what to use to create the image you want.
This happy pair of scarecrows could be made to last throughout the years. As you can see from the image Mrs. Scarecrow has a lovely pedestal base with a nice leafy trim on her sweater. I absolutely love her pearls, but I would go with a papier-mache pumpkin head and may begin with a straw hat and change it out as the season changes. I could also get into having a nice hat with feathers to give it some zing . . . and a feather boa may work nicely for the trim on her blouse or sweater. I’m also thinking of making her into a 20’s flapper . . . which would bring a more fun and somewhat whimsical flavor to your garden — a delightful display for a summer celebration.
As for Mr. Scarecrow, I’d find a bushel basket for his body and also add a papier-mache pumpkin head. I absolutely adore his sports coat and hat. His attire could be altered to fit in the season or the formality of your vegetable or flower garden.
Initially, I thought of Laurel and Hardy when I glanced at this pair of happy scarecrows.

This is a spring project that will “grow” with me throughout the summer and fall. Then to be replaced with snowmen that could be equally fun and delightful to dress up until we return to spring. I just love it when home and yard decor can be fun and last for quite a few seasons. This jolly pair would also be welcome for Thanksgiving.
I know you’re thinking!! I can feel the excitement of getting started on your happy pair of scarecrows.
Thanks for stopping by!
by Sharon | Mar 25, 2015
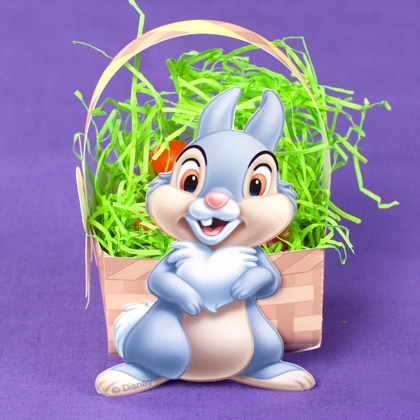
Easter Wouldn’t Be Complete Without This Special Easter Basket You Can Make
Adorable Thumper is here along with a special Easter Basket you can make with this free printable from http://family.disney.com
When most children were falling in love with Bambi, I fell head over heels in love with Thumper. He made me laugh and he gave me some wisdom I’ve never forgotten, “If you can’t say something nice, don’t say nothing at all.”
Be sure to click the image for the free printable you can print out on card stock and assemble.
I always like to add something else to make your visit worthwhile. Here you go:
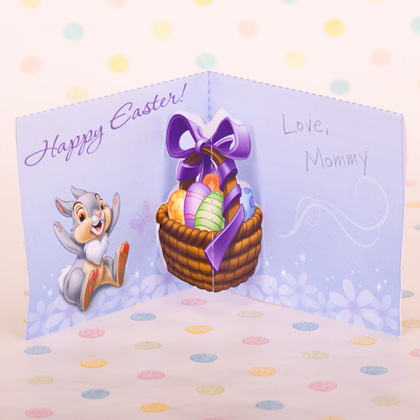
Thumper’s Easter PopUp Card!!! Click the image and print it out on card stock to send to someone special this Easter.
Have a Happy Easter!