by Sharon | Feb 16, 2016
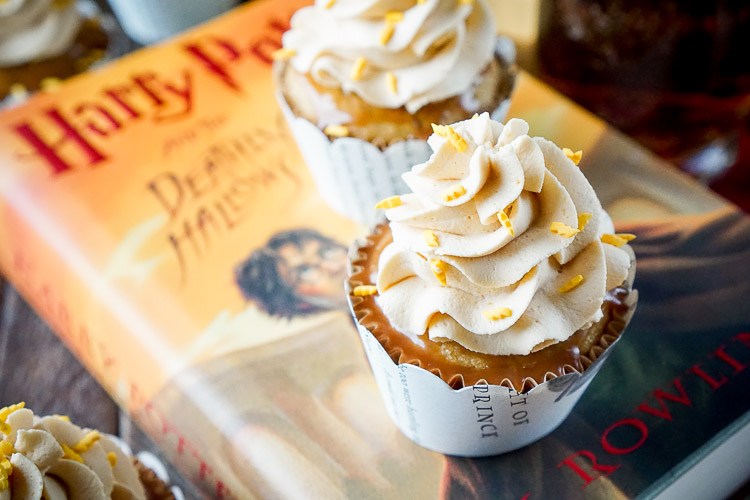
Oh yes! A Harry Potter Fan Delight!!
Have you tried the Harry Potter Butter Beer?
If so, and even if you haven’t, you’ll love these cupcakes!!
Let’s Get Started With This Recipe!!!
It may seem a bit complicated . . . but it’s fit for the Great Harry Potter!!!
Cupcake Ingredients:
- 2 cups all-purpose flour
- 1 cup light brown sugar
- 1 teaspoon baking soda
- 1 teaspoon baking powder
- 1/2 teaspoon salt
- 3 large eggs
- 1/2 cup vegetable oil
- 1 teaspoon imitation butter extract
- 1 teaspoon vanilla extract
- 1/2 cup buttermilk
- 1/2 cup cream soda
- 1 cup Heath Toffee Bits — not the ones with chocolate
Sauce Ingredients:
- 3/4 cup butterscotch chips
- 1/2 cup heavy cream
Frosting Ingredients:
- 2 cups heavy cream
- 1/3 cup butterscotch dry instant pudding mix
- 1/2 cup confectioner’s sugar
- 3 teaspoons imitation butter extract
Toppings:
Cupcake Instructions:
- Preheat oven to 350° F.
- Line cupcake pan with liners.
- Combine flour, sugar, baking soda, baking powder and salt in a medium sized bowl and stir with a whisk until well mixed and smooth.
- Get out the stand mixer fitted with a whisk attachment and a large bowl, beat together the eggs, oil, extracts and buttermilk.
- Beat in the dry ingredients and the cream soda, alternating between the two until the batter is smooth.
- Mix in the toffee bits.
- Add 1/4 cup batter to each cupcake liner and bake for 18 to 22 minutes.
- Remove from oven and transfer to a cooling rack.
- Bake remaining cupcakes.
- Meanwhile . . . make the sauce by placing the butterscotch chips in a small metal bowl and heating the heavy cream in a small sauce pan over medium heat.
- Bring the cream to a simmer, then pour it over the butterscotch chips. Let set for 3 to 4 minutes.
- Then, whisk the cream and chips together until a rich sauce forms.
- Put it in the refrigerator to cool and thicken for about 30 minutes.
- Time to prepare the frosting by combining all the ingredients in a large stand mixer bowl fitted with a whisk attachment and beat on medium high speed for about 3 to 4 minutes until light and fluffy frosting forms.
- Place the frosting to a pastry bag
- Remove sauce from the fridge and dip the tops of the cupcakes into it. Allow to set for about 15 minutes.
- Pipe the frosting onto the cupcakes and finish with sprinkles.
There you have your Butter Beer Cupcakes.
Thanks for stopping by!
Sharon
by Sharon | Dec 22, 2015
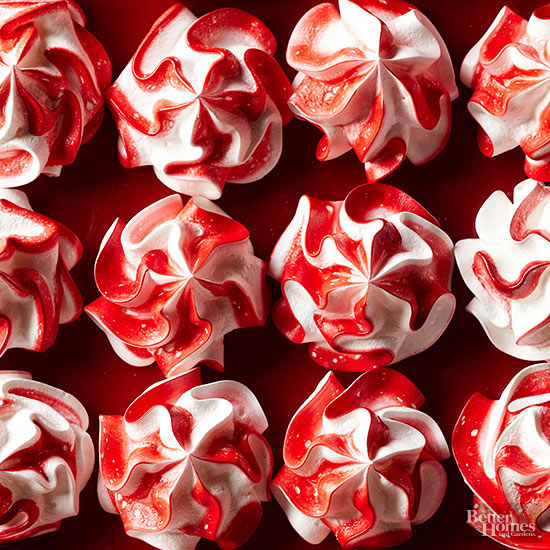
These Meringues Are A Treat To The Eye With An Irresistible Taste
It’s definitely time to be thinking about the variety of cookies you want to make for family, friends and neighbors.
Christmas is just a few days away . . . oh my! Time to get to work!!!
It is raining today . . . a good day to stay indoors and bake cookies. So, let’s get started with these beautiful Star Mint Meringues.
Star Mint Meringue Cookies Recipe
Ingredients for 24 cookies:
- 3 egg whites
- 1/4 teaspoon cream of tartar
- 1/4 teaspoon peppermint extract
- 1/8 teaspoon salt
- 3/4 cup of sugar
- Red paste food coloring
Directions:
- Preheat oven to 200° F.
- Line a cookie sheet with parchment paper and set aside.
- In a large mixing bowl beat egg whites, cream of tartar, peppermint extract and salt with an electric mixer on medium speed until stiff peaks form and the tips curl.
- Gradually add sugar — just a tablespoon at a time. Beat on high speed until you have stiff peaks and the tips stand straight.
- With a new small paintbrush, brush stripes of red food coloring on the inside of a decorating bag fitted with a 1/2 inch open star tip.
- Carefully spoon the egg white mixture into the decorating bag.
- Pipe 2 inch stars 1 inch apart onto the prepared cookie sheet.
- Bake 1 and 1/3 hours or until the meringue appears dry and the cookies are firm when lightly touched.
- Transfer the cookies to a wire rack to cool thoroughly.
Now that wasn’t so bad. I hope you like this recipe and give it a try.
by Sharon | Oct 9, 2015
I couldn’t think of anything more appropriate for this 300th post!
I absolutely love apple anything. Then add a caramel glaze over it and it is pure heaven!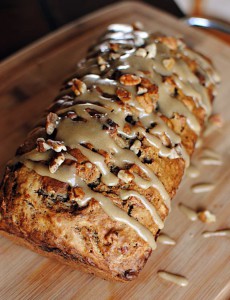
My mother and grandmother were the pie makers in the family. Sure, I could join their ranks . . . but there are times you do have to go out a bit on your own and have your own thing. Now, cakes and decorating them was never my thing. When I discovered Bunt Cakes I was in heaven! I’m not a frosting type of person. If I’m going to eat cake, I want cake. . . not icing.
Yes, I am a bit strange. I’ve never been into sweet treats. I’ve never developed a taste for fruit cake — I can’t imagine people eating them . . . but they seem to be as popular as ever.
Now a real fruit bread is a whole flavorful treat. Drizzle it with a caramel glaze and I’m totally hooked.
Apple Bread With A Caramel Glaze Recipe
Ingredients:
For the Bread
- 1-1/2 cups peeled and shredded baking apples — that’s 2 large apples)
- 1 cup packed brown sugar
- 1/2 cup buttermilk
- 1/2 cup vegetable oil
- 4 lightly beaten eggs
- 3 cups all-purpose flour
- 1/2 cup chopped pecans or walnuts — or skip the nuts
- 2 teaspoons baking soda
- 2 teaspoons ground cinnamon
- 1 teaspoon ground nutmeg
For the Glaze
- 2 tablespoons butter or margarine
- 1/4 cup packed brown sugar
- 1 tablespoon milk
- 1/2 cup sifted powdered sugar
Directions:
- Heat oven to 350°F
- Grease only the bottom of 2 8 x 4 inch loaf pans with cooking spray or shortening.
- In a large bowl, stir together the apples, cup of brown sugar, buttermilk, oil and eggs.
- Stir in the remaining bread ingredients until all the dry ingredients are moistened.
- Pour into pans.
- Bake 45 to 55 minutes — do the toothpick test.
- Cool 10 minutes on a cooling rack before loosening the sides of the loaves from the pans.
- Remove loaves from the pans and place top side up on cooling rack.
- All the loaves to cool completely. It may take an hour.
- In a 1 quart saucepan, melt the butter over medium heat.
- Stir in 1/4 cup of brown sugar.
- Heat to boiling, stirring continuously. Reduce heat to low.
- Boil and stir for a couple of minutes.
- Stir in the milk.
- Heat to boiling; remove from heat. Allow to cool to lukewarm — it takes about 30 minutes.
- Gradually stir powdered sugar into glaze mixture.
- Place saucepan with the glaze in a bowl of cold water.
- Stir until smooth and thin enough to drizzle.
- If you find the glaze becoming stiff, stir in additional — about 1/2 a teaspoon at a time, or you can heat it over low heat, stirring constantly.
- Drizzle the glaze over the loaves.
If you’re not going to serve it to a hungry crowd you may need to wrap it tightly. It can be stored at room temperature for up to 4 days or refrigerated up to 10 days.
It’s a great bread for any time of the year.
Thanks for stopping by! Please leave me a comment.
by Sharon | Oct 7, 2015
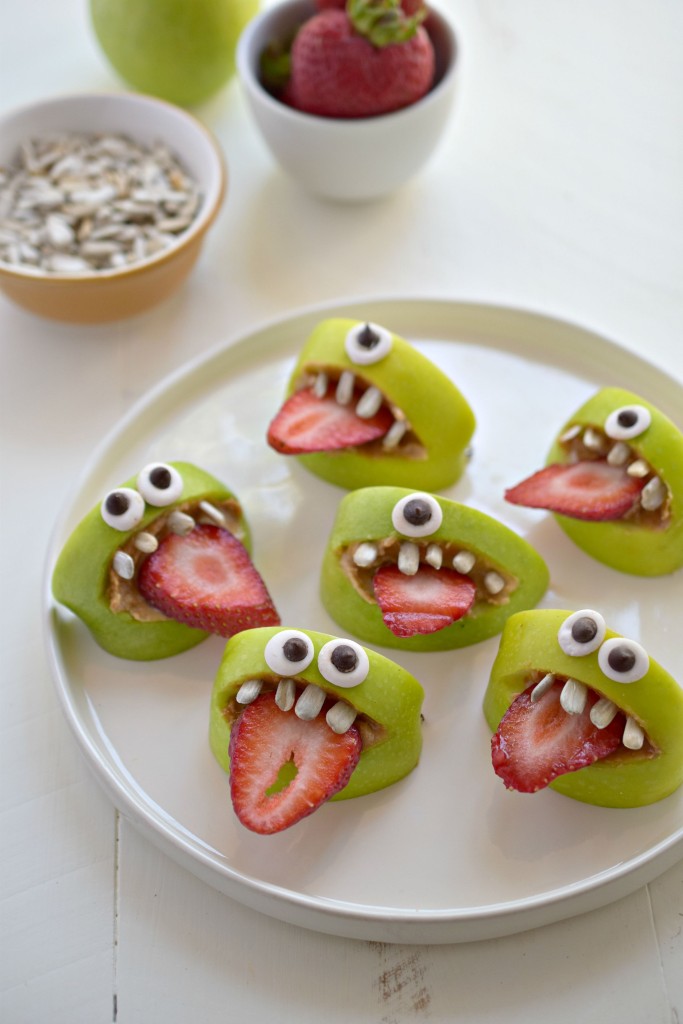
It is fun to play with your food!!
These little guys would truly be a fun surprise to put in your kid’s lunch . . . or to have out for an after school snack. They are truly easy to make. . . and fun to eat.
You can make these apple bites with green or red apples. I guess the green makes them look more like monsters . . . but you decide what you want.
You’ll need:
- green or red apples, washed, cored and quartered
- strawberries, washed and sliced for the monster’s tongue
- sunflower seeds for the teeth
- edible googly eyes
- peanut or other nut butter to keep the pieces in place
They’re easy and fun for the kids.
I try to keep an assortment of edible googly eyes on-hand. You never know when you’ll need them.


Have fun and let me know how your googly-eyed apple bites turned out.
Until next time,
Sharon
by Sharon | Oct 5, 2015
I suppose you could make these any time, but for some reason sweet potatoes come to mind in the fall and stay there through the holiday season. But, it could be a good one to remember for your Super Bowl Party . . . introduce it now and you’ll have requests for it from now on . . . And, don’t tell them it’s a healthy snack which has pretty much turned into a meal.
Sweet Potato Skins With Chipotle Chicken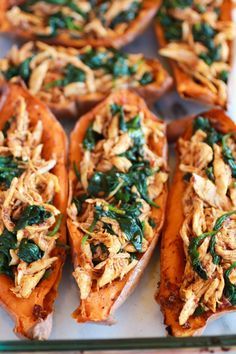
Ingredients:
- 3 medium sweet potatoes
- 2 small boneless skinless chicken breasts
- 1/4 cup olive oil
- 2 tablespoons of fresh lime juice
- 2 minced garlic cloves
- 2 minced chipotle peppers
- 1 teaspoon dried oregano
- 1 teaspoon cumin
- 2 teaspoons chili powder
- salt and pepper
- 2 cups fresh spinach
- 5 ounces grated sharp white cheddar cheese
- chopped cilantro for garnish
- serve with Greek yogurt
Directions:
- Preheat oven to 350 degrees.
- Wash the sweet potatoes and prick all over with a fork before placing them in a baking dish and popping them in the oven to bake for 45 minutes to an hour.
- Place the chicken in a baking dish and rub with a tablespoon of olive oil (salt and pepper if you like).
- Bake in the oven for 25 minutes.
- Allow the chicken to cool before shredding it.
- When the sweet potatoes are done, but them in half and allow to cool for 5 to 10 minutes.
- In a medium sized bowl combine the olive oil, lime juice, garlic, chipotle peppers, oregano, cumin, chili powder, salt and pepper and set aside.
- You’re going to want to wilt the spinach — you can do that in a small skillet over medium heat or in the microwave.
- Toss the spinach and shredded chicken together, set aside, but keep warm.
- Turn the oven up to 400 degrees.
- Scrape the sweet potato out of the peel, leaving a medium size layer of flesh inside with the peel so it can stand on its own and place in a baking dish.
- Brush the skins with a little of the chipotle sauce and back for 5 to 10 minutes until crispy.
- While the skins are baking, mix the spinach, chicken and chipotle sauce together.
- Remove the skins from the oven and stuff with the chicken mixture.
- Top with shredded cheese and bake for 10 minutes or until the cheese has melted and the skins are hot and crisp.
- Serve with fresh chopped cilantro and Greek yogurt.
This is a healthy treat the whole family will enjoy.
Leave me a comment.
Thanks for stopping by!
Sharon