by Sharon | Aug 21, 2014
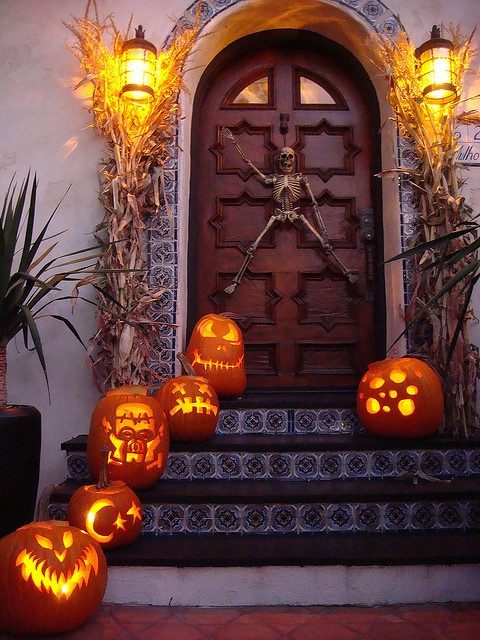
I find pictures to be inspirational. It’s amazing how people go all out in their pumpkin carving. I suppose you can never have enough carved pumpkins lighting the path for the trick-or-treaters or just to decorate your porch.
I think going to the pumpkin patch is an exciting venture and it is difficult to select only one, so why not go all out. My thought is once you get started on one pumpkin, why not do another. Yet, it is good to pace yourself, depending upon how elaborate your design is.
Here are a few templates I thought would be fun:

Headless Horsie
 Witch on a Broom
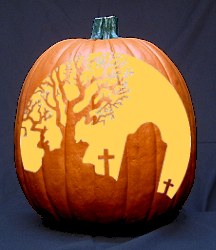 Tombstone
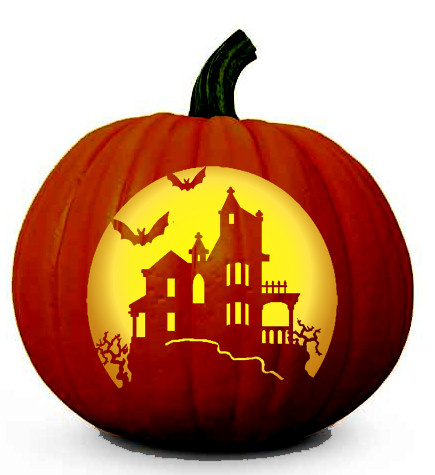 Haunted House
I hope these designs inspired you, I’ll have more free templates as we get closer to Halloween. I love seeing what others have done with their pumpkins. Some people are very clever.
Thanks for stopping by!
by Sharon | Aug 10, 2014
These Halloween Lanterns can hang indoors or outdoors and will be illuminated by a battery operated votive candle light. I buy these candle lights by the dozens to illuminate paper crafts or to put behind them to give them a creepy glow. These hanging lanterns are made from orange translucent vellum paper. They’ll give an eerie glow to wherever you hang them.
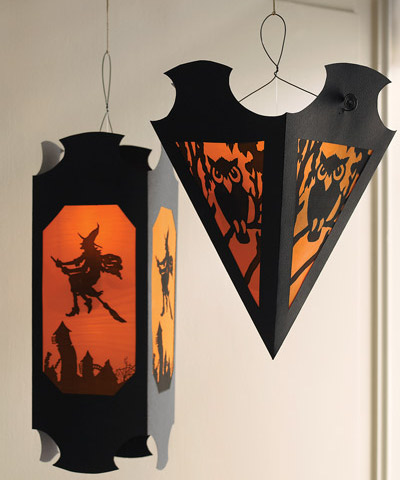
The image and free printables are compliments of http://www.marthastewart.com/913799/hanging-vellum-halloween-lanterns
Just click the link above for the directions and the free printables.
Here are links for some items you’ll need:
heavy black paper
Orange Vellum
Clear Monofilament
Battery-Operated Votive Candles
I hope you enjoy this project!
Thanks for stopping by!
by Sharon | Aug 7, 2014
Create a little grave yard scene on top of your favorite cupcakes and you have a winning treat for your guests. The tombstones are quite appropriate for the season: Overdosed on Candy, A Very Sweet Ending, Death by Chocolate, RIP. I print them out on cardstock, glue them on a toothpick and I’m ready to put them on my frosted cupcakes, but they need something else. That’s where you can be creative with a variety of chopped up mini candy bars and melted white chocolate chips. You can either create your designs on parchment paper by drawing them out freehand or you can use candy molds.
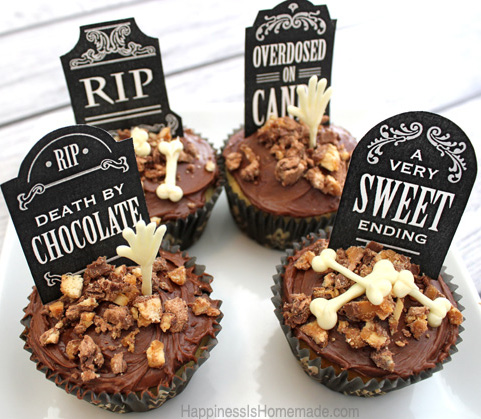
Image Compliments of http://www.happinessishomemade.net
Here are the Tombstones
Compliments of http://www.blog.chickabug.com
If you’re not comfortable drawing out your own hands and bones, here’s a candy mold you may find helpful:
Thanks for stopping by!
by Sharon | Aug 5, 2014
Pumpkin Carving is a definite tradition in America. Halloween just wouldn’t be the same without having carved pumpkins decorating porches with a lit candle inside. Now, how those pumpkins are decorated is a real work of art. Some paint faces on their pumpkins freehand or use templates and there are those who go to great lengths to carve their pumpkins by scraping and basically sculpting an image. For most of us, we find an appropriate template to use to guide us through the process and to the finished result.
Scary faces are popular and some not so scary. These are the easiest and the most traditional, since I’m into traditions.
Here’s one you may enjoy.
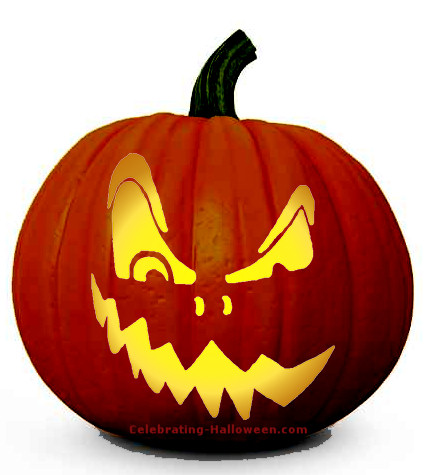
Image and Free Template Courtesy of http://www.celebating-halloween.com
Here’s the Free Printable
by Sharon | Aug 1, 2014
This catapult is popular around my house. You can learn a lot about people when you have a few paper craft toys on the coffee table enticing your guests to play with them.
This one is great fun! It has a range of up to 10 feet. Be sure to make several so you can give them as gifts for your guests to take home. It’s always good to have a couple around just for fun. It can be addicting. I always want to see how many times I can hit my target in a row and then beat my last score.
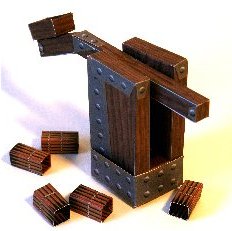
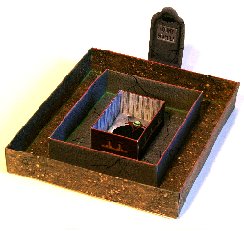 This is what you’ll get — a catapult and a target of a vampire grave plus a dozen bundles of stakes.
The images and free templates are compliments of http://www.ravensblight.com
I know you’re eager to get the instructions and free templates so you can begin playing:
Assembly Instructions
Catapult and Target
Print the assembly instructions on regular printer paper, but use a heavy card stock for the catapult, target and bundle of stakes. These are definitely going to get a workout.
Thanks for stopping by!
by Sharon | Aug 1, 2014
Tri Cornered Pirate Hats are fun for kids of all ages. Even Chuckles, my dapper skull enjoys wearing it from time to time. He enjoys the eye-patch, too. This project is made from brown wrapping paper at least 2 feet wide and 4 feet long.
You’re going to need a bowl about the size of the head that’s going to be wearing it, three twist ties, scissors, a pencil and glue. Plus the directions that include the eye-patch and emblems you may want to add to your brown paper tri cornered pirate hat.

The image and Pirate Hat Instructions plus Eye-Patch are Compliments of http://www.ravensblight.com
Pirate Hat Instructions Plus
Well, there you have it. This pattern could be adapted to any material you think is appropriate for your Pirate Hat. I’d make one out of paper first before cutting into fabric.
Enjoy and Thanks for Stopping by!


