by Sharon | Dec 2, 2014
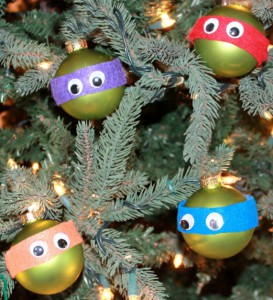
Aren’t these ornaments the best!!! And they’re so easy to make. I think it will take you longer to gather up your supplies than it will take you to make these adorable Teenage Mutant Ninja Turtle Ornaments.
The materials you’ll need are obvious, but humor me:
- Green Round Ornaments
- Felt Squares: red, blue, purple and orange Or you may be able to find Felt Strips
- Glue of your choice
- Wiggly Eyes
How to assembly them is also easy, but I’ll write them out:
- Cut a strip out of your felt square about an inch wide — depends on the size of your ornaments and the size of your wiggly eyes.
- Run glue all the way around the ball-shaped ornament.
- Wrap the felt strip around the ornament on top of the glue. You can overlap the felt strip by gluing the pieces together. Cut off excess if necessary.
- Put glue on the back of a wiggly eye and put it in place on the felt. Do the same with the other eye.
- Now repeat steps 1 through 4 for the rest of your Teenage Mutant Ninja Turtle Ornaments.
These would make great gifts for the Teenage Mutant Ninja Turtle fans.
It’s so much fun to make them yourself!
Thanks for stopping by!
by Sharon | Nov 29, 2014
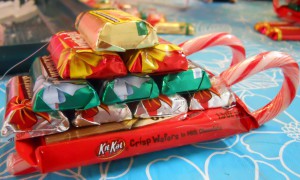
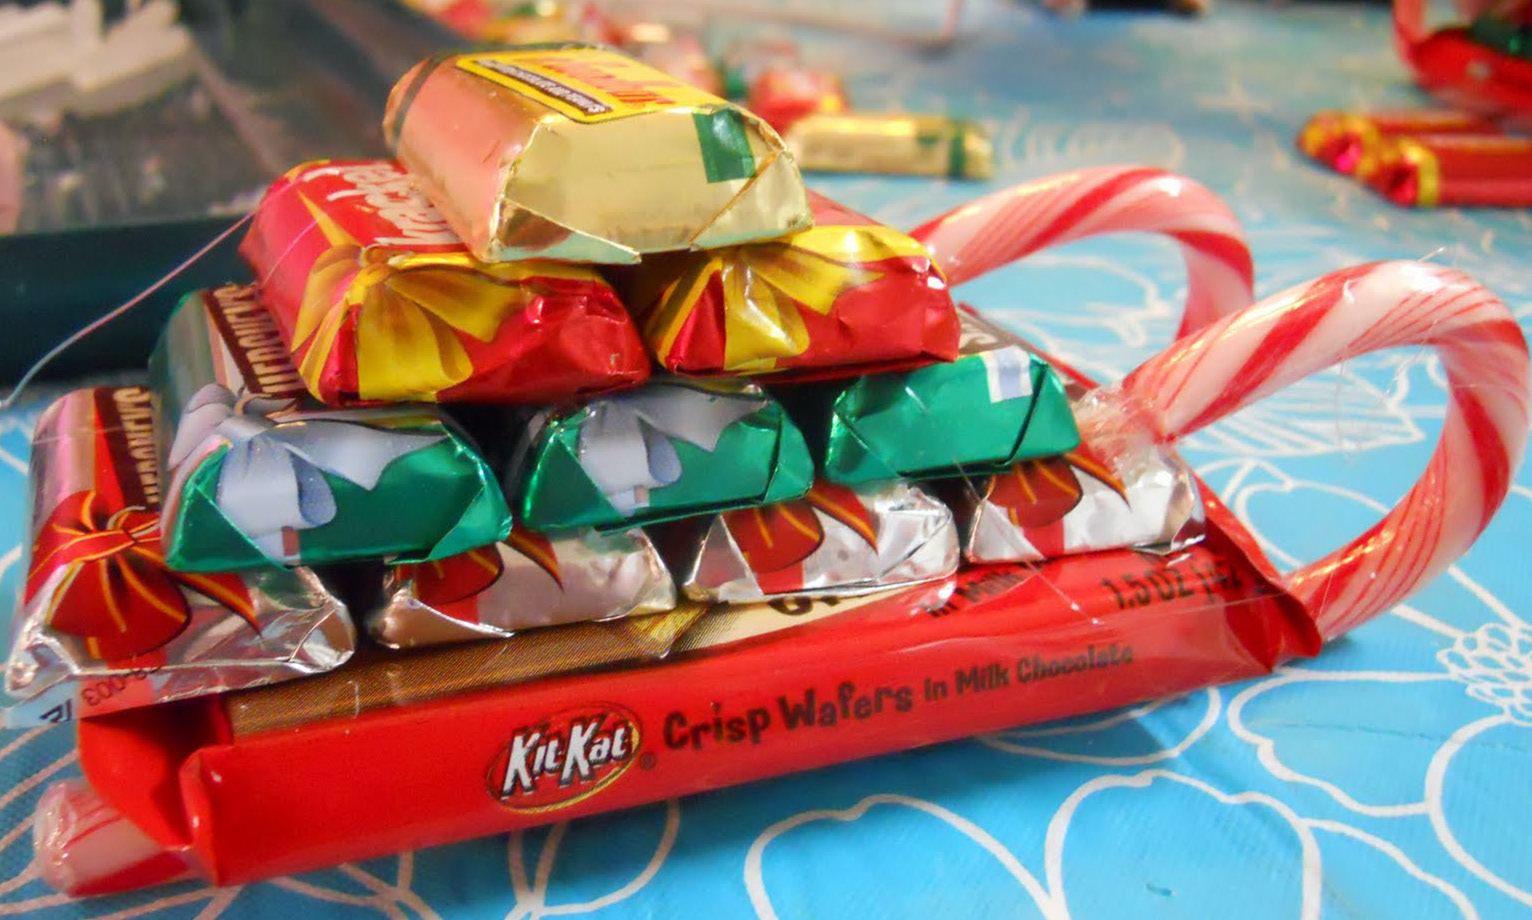
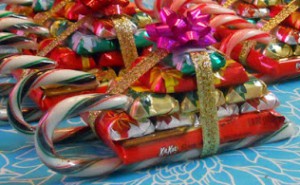
Image from http://cutediyprojects.com
When I saw these candy sleighs, I knew I had to make these. As you look at the image, you’ll get the idea of how to make them. You can use mini candies or you could use homemade candies or cookies. If you want to go that route, I’d get my candy canes set and have a square cookie or brownie as the base. I’d wrap the brownie and find something non-toxic to attach to the wrapped candy canes. Some people use hot glue which is fine for them. I’m not into burning myself so I go for Elmer’s School Glue, but you find what works for you. Then as you can see, you’re building a pyramid. They make great gifts when you add ribbon and a bow on top. These are good to have around for neighbors who stop by during the holidays.
Instructions can be found at http://cutediyprojects.com
Now, get started . . . you know the children will want to give them to their friends . . . maybe even their teacher . . . you’re going to need them for your neighbors and friends . . . family will want them too . . . how large is your demand growing for this clever and tasty gift?
Thanks for stopping by! We’ll have more . . .
by Sharon | Nov 28, 2014
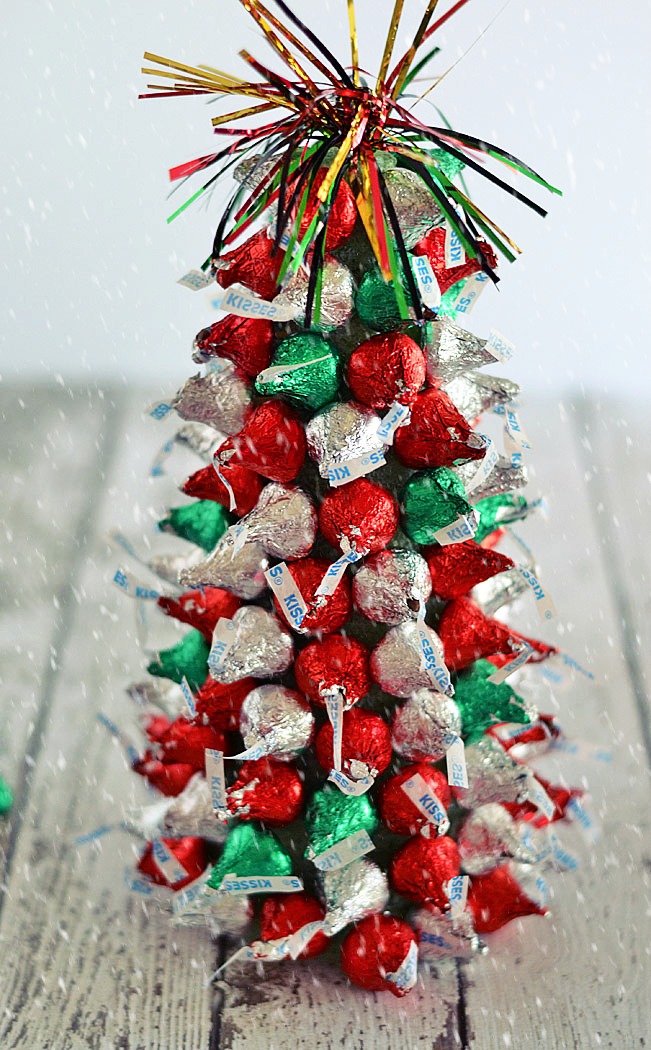
Here’s a wonderful Christmas Tree Centerpiece that’s good enough to eat!
I doubt it’s going to last through Christmas . . . maybe I should buy some more bags of Hershey Kisses . . .
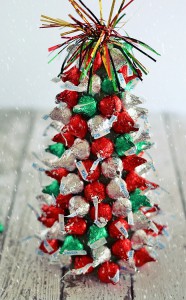
Image and Tree Idea from http://kitchenmeetsgirl.com
To make this “Kiss-Mas-Tree” you need to begin with a foam cone from your favorite craft store or dollar store. Select the size that suits the centerpiece you want to create. I ended up going for a large one and a couple of small ones. I know I’ll have nibblers — sneaky little angels they are.
You can go for the red and green ones and add the traditional silver ones for good measure or go totally silver or divide them up as I did. I made a silver and green small tree, a silver and red small tree and my large one I did with the silver, red and green.
These little kisses aren’t as soft as one would imagine. You’re going to need to have a clean turkey skewer to use to poke a little hole in the bottom of each Hershey Kiss. I used wooden round toothpicks, broke them in half . . . to secure the kiss on the toothpick and then stick it into the foam cone.
I started from the bottom and worked my way around, then up to the top. It’s a fun project for the kids to do, but keep an eye on the kisses . . .
For the top, you can get creative with the colorful garland or ribbon or stars . . . allow your imagination to go crazy! There are all kinds of great decorative touches available that you can buy and use to top these little trees off right.
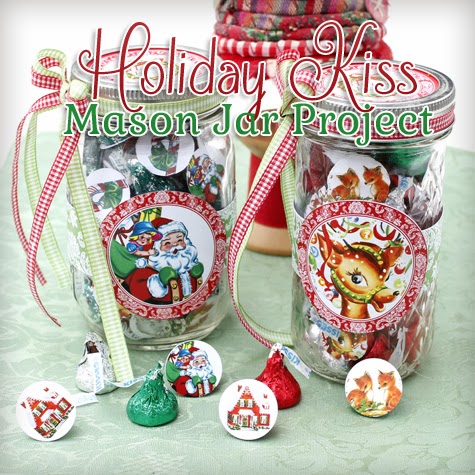
Putting these kisses in a small jar as hostess gifts is also a good idea.
I’ll need to look into finding some labels . . . but you can use any of your tree topper left-overs to decorate the lids of the jars. Something to think about.
How about this!!!!!
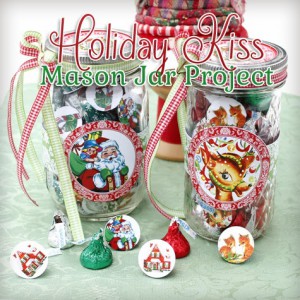
Printable Candy Jar Labels from http://thegraphicsfairy.com
Here are labels that will do these proud.
Click the link under the picture and you’ll have more labels than you may originally thought you’d need. I like being able to decorate the bottom of the kisses — they look nice through the jar. The jar labels for the front and also for the top and the lid can be embellished, too. Be sure to check these out . . .
Don’t forget to tell your friends about TwoCansOnAString.com
by Sharon | Nov 3, 2014
This is truly an impressive Christmas or Winter Village that you can make and display. It is a Christmas diorama of Pretzschendorf (paper models). You can access them at http://www.grundschule-pretzschendorf.de/en/Our_village/paper_models.html
There are 48 historical models for you to make. They are from the early 20th century. Make them all or select the ones you like. They make nice gifts, too. You may like to decorate packages with them or display them with a plate of cookies. I’m confident you’ll find many wonderful uses for the various buildings. I’ve cut out some windows and put battery operated tea lights in them to light up my village. I also have an N-Gauge Train Set running through my village. I do not have any powered cars, but I do have various accessories to populate my village.
The workmanship on these paper craft models is outstanding and well worthwhile for you to check out.
Thanks for stopping by!