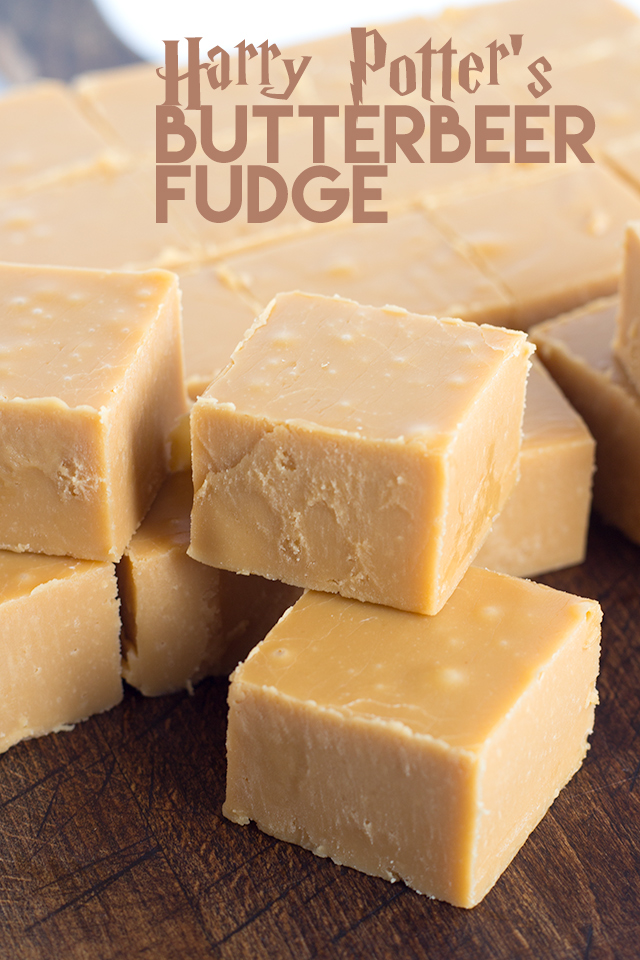
A Delicious Recipe That Will Have Your Family Wanting More . . . Please.
Let’s get on with the recipe:
Ingredients:
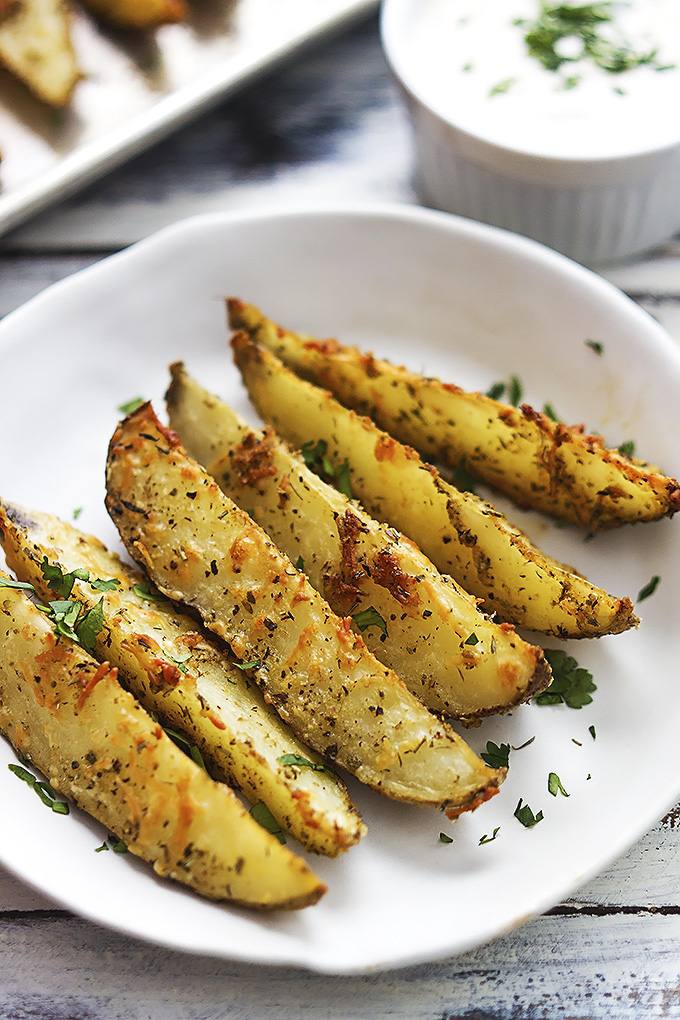
3 to 4 large russet potatoes sliced into wedges
4 tablespoons olive oil
2 teaspoons salt
2 teaspoons garlic powder
2 teaspoons Italian seasoning
1/2 cup shredded parmesan cheese
You may want to use fresh parsley or cilantro
And as a dip, you may want to use Ranch Dressing or Blue Cheese Dressing
Directions:
Preheat oven to 375° F.
Lightly grease a large baking sheet and set aside.
Place potato wedges in a large bowl.
Drizzle with olive oil and toss to coat.
In a small bowl whisk together salt, garlic powder and Italian seasoning.
Sprinkle potato wedges with the shredded cheese. Toss to coat, then sprinkle with the seasoning mixture.
Place potato wedges on prepared baking sheet in a single layer with skin sides down.
Bake for 23 to 35 minutes until potatoes are fork tender and golden.
Sprinkle with freshly chopped parsley.
Dip into Ranch or Blue Cheese Dressing.
This is a delightful snack to have on a day when you want something, but not sure what. You can’t go wrong with potatoes . . . I do hope you’ll try this recipe.
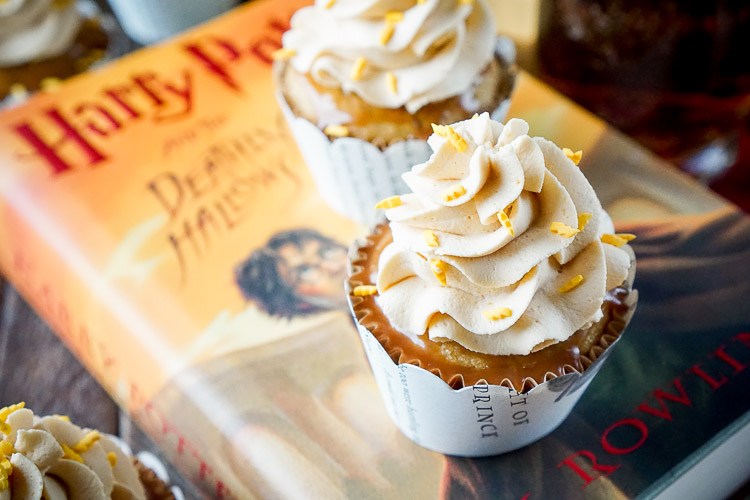
If so, and even if you haven’t, you’ll love these cupcakes!!
Let’s Get Started With This Recipe!!!
It may seem a bit complicated . . . but it’s fit for the Great Harry Potter!!!
Cupcake Ingredients:
2 cups all-purpose flour
1 cup light brown sugar
1 teaspoon baking soda
1 teaspoon baking powder
1/2 teaspoon salt
3 large eggs
1/2 cup vegetable oil
1 teaspoon imitation butter extract
1 teaspoon vanilla extract
1/2 cup buttermilk
1/2 cup cream soda
1 cup Heath Toffee Bits — not the ones with chocolate
Sauce Ingredients:
3/4 cup butterscotch chips
1/2 cup heavy cream
Frosting Ingredients:
2 cups heavy cream
1/3 cup butterscotch dry instant pudding mix
1/2 cup confectioner’s sugar
3 teaspoons imitation butter extract
Toppings:
Sprinkles
Cupcake Instructions:
Preheat oven to 350° F.
Line cupcake pan with liners.
Combine flour, sugar, baking soda, baking powder and salt in a medium sized bowl and stir with a whisk until well mixed and smooth.
Get out the stand mixer fitted with a whisk attachment and a large bowl, beat together the eggs, oil, extracts and buttermilk.
Beat in the dry ingredients and the cream soda, alternating between the two until the batter is smooth.
Mix in the toffee bits.
Add 1/4 cup batter to each cupcake liner and bake for 18 to 22 minutes.
Remove from oven and transfer to a cooling rack.
Bake remaining cupcakes.
Meanwhile . . . make the sauce by placing the butterscotch chips in a small metal bowl and heating the heavy cream in a small sauce pan over medium heat.
Bring the cream to a simmer, then pour it over the butterscotch chips. Let set for 3 to 4 minutes.
Then, whisk the cream and chips together until a rich sauce forms.
Put it in the refrigerator to cool and thicken for about 30 minutes.
Time to prepare the frosting by combining all the ingredients in a large stand mixer bowl fitted with a whisk attachment and beat on medium high speed for about 3 to 4 minutes until light and fluffy frosting forms.
Place the frosting to a pastry bag
Remove sauce from the fridge and dip the tops of the cupcakes into it. Allow to set for about 15 minutes.
Pipe the frosting onto the cupcakes and finish with sprinkles.
I guess tree houses aren’t just for kids . . . but the one in the picture is awesome.
It seems to be designed for kids.
With a little imagination you could make it into quite a spectacular “get away” for the whole family. No long drive to get somewhere, just pack up a few things and go into the backyard tree house.
You would definitely have a spectacular view. You may not have modern lighting and plumbing . . . but you might be able to add that, too.
People definitely go all out in their creations of tree houses and play houses for children.
You could add a slide for a fast exit.
This is definitely “food for thought” when you’re thinking of building a tree house for the kids . . . or for the whole family to enjoy.
It may make a great home office, but you’d like to have wifi and electricity and plumbing. You’d need a refrigerator and maybe even a small kitchen. And don’t forget about heating and cooling.
I’m sure every family member would find a good use for this tree house. It may be a good place to unplug from all the gadgets and gizmos and enjoy star gazing and conversation.
I know the kids would love a “sleep over” in the tree house . . .
It would be impressive to invite people over and spend a quiet evening.
I can definitely see the value of having such a magnificent tree house structure in my yard.
I hope you enjoyed this post . . . Let me know if you’ve designed a special tree house for your family.