Mickey And Friends Fall Recipe Cards

Don’t You Just Love Them!!!

Image is compliments of http://family.disney.com

Minnie, Mickey and Daisy are available to give you a hand in getting your favorite fall recipes in order. You may want to print out dozens on either card stock or plain copy paper. I prefer the card stock, but use what works best to you.

I don’t know about you, but some colorful recipe cards are exactly what I need to get in the mood to bake up batches of cookies, pies and other delicious fall concoctions. When I see these cards in my recipe box, I immediately know to pay attention to them.

These are also great when you’re sharing recipes with family and friends.

Here’s your first recipe Mickey and Mini’s Pumpkin Whoopie Pies

This is what you’re going to need:
  • Dig in the kitchen cupboards and drawers for: mixing bowls, whisk, electric mixer, wooden spoon
  • 2 cups of flour — your choice, try out the gluten free variety that seems really popular
  • 1 teaspoon baking powder
  • 1 teaspoon baking soda
  • 1 teaspoon ground cinnamon
  • 1/2 teaspoon salt
  • 1/2 cup softened butter
  • 1 cup brown sugar
  • 1 large egg that you’re going to beaten ever so lightly
  • 1 cup cooked pumpkin puree
  • 1 teaspoon vanilla extract

Goodness, I never thought this list was going to end!

You’re going to need some more stuff to put these delicious whoopie pies together:

  • For you fancy and seasoned bakers out there, you’ll need a Pastry bag with 3/4-inch  opening OR, if you want to do it the easy way, I’d go for a Large Plastic Food Storage Bag and snip out a lower corner, but don’t snip it out now 🙂
  • Baking sheets
  • Parchment paper
  • Cooling rack
  • Cream cheese frosting — use your recipe or go for the store bought — or use a frosting of your choice

Let’s get these whoopie pies made, shall we:

  1. Heat the oven to 350 degrees.
  2. In a mixing bowl, whisk together the flour, baking powder, baking soda, ground cinnamon, and salt.
  3. In a second mixing bowl, beat the butter and brown sugar together until creamy.
  4. Beat in the egg, pumpkin puree and vanilla extract.
  5. Stir the flour mixture into the butter mixture.
  6. Then spoon the batter into the pastry or plastic food storage bag. Once it’s filled, snip off a corner, if you’re using a plastic food storage bag. You may want to experiment with your snips 🙂
  7. For the Mickey faces, pipe 2.5-inch blobs of batter on a parchment paper lined baking sheet, not too close. Remember, you need two for each whoopie pie. Use a clean fingertip to gently flatten the blobs into uniform circles. You’re going to have to keep your fingertip clean, so a wet paper towel works well or you can dip your fingertip in water — the batter is going to be sticky.
  8. Pipe small ear blobs at the top of each batter face, keeping them as close in size as possible. Again, use a wet fingertip to flatten them.
  9. Pop them in the oven and bake the Mickey pumpkin cakes until they spring back when you press down on the center. This will take 8 to 10 minutes.
  10. Take them out of the oven and allow them to cool on the baking sheet before transferring them to a wire rack to cool completely.
  11. Spoon cream cheese frosting into a pastry bag or get another handy dandy plastic food storage bag and snip off the corner.
  12. Pair up the baked pumpkin cakes, matching the shapes and sizes as best you can.
  13. Working with one pair at a time, turn one of the cakes face down and pipe moderate mounds of frosting on the face and ears.
  14. Top the frosted cake with its match and gently press down to spread the filling and hold the whoopie pie together.

Well, there you have it. And, I would say it is definitely worth it when you see your kids gobble them up. There is definite satisfaction in knowing you made these yourself. The big plus for me is knowing exactly what’s in it.

Enjoy the recipe cards and this great Mickey and Mini Mouse Pumpkin Whoopie Pie Recipe.
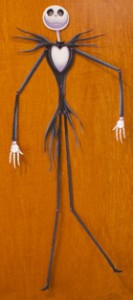
Jack Skellinngton Door Decoration Free Printable

Halloween would not be complete without Jack Skellinngton hanging on your door. He can hang indoors or outdoors depending on your decorating pleasure. It doesn’t have to be your front door or back door, but any door in the house. Or you may prefer to hang him on a wall. I doubt Jack would mind as long as he shares in your Halloween Fun.

You know his likeness is going to adorn cupcakes and cookies. For some reason his mug gets into something I make for Halloween. The kids absolutely love him and, of course, we have to watch The Nightmare Before Christmas, too. He is quite a dapper gent and would look great wherever he hangs.

jack-skellington-door-hanger-halloween-printable-photo_edited-1

Image and Free Printable Compliments of http://www.spoonful.com

You can download Jack Skellinnington on either plain paper or cardstock. I prefer cardstock because his arms and legs are so skinny, but you decide what is best for you.

I hope you and your family enjoy having Jack around this Halloween.

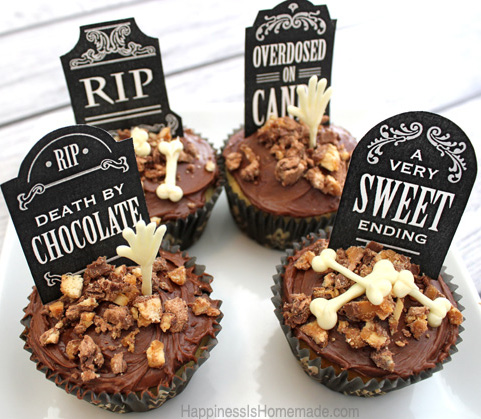
Tombstone Cupcake Toppers — Free Printable

Create a little grave yard scene on top of your favorite cupcakes and you have a winning treat for your guests. The tombstones are quite appropriate for the season: Overdosed on Candy, A Very Sweet Ending, Death by Chocolate, RIP. I print them out on cardstock, glue them on a toothpick and I’m ready to put them on my frosted cupcakes, but they need something else. That’s where you can be creative with a variety of chopped up mini candy bars and melted white chocolate chips. You can either create your designs on parchment paper by drawing them out freehand or you can use candy molds.

Halloween-Graveyard-Cupcakes-SpookyCelebration-shop_edited-1

Image Compliments of http://www.happinessishomemade.net

Here are the Tombstones

Compliments of http://www.blog.chickabug.com

If you’re not comfortable drawing out your own hands and bones, here’s a candy mold you may find helpful:

    Thanks for stopping by!

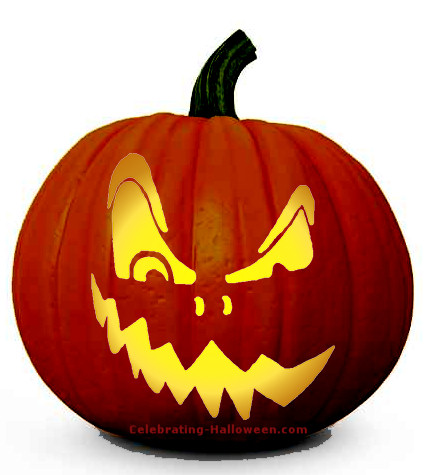
Scary Pumpkin Face

Pumpkin Carving is a definite tradition in America. Halloween just wouldn’t be the same without having carved pumpkins decorating porches with a lit candle inside. Now, how those pumpkins are decorated is a real work of art. Some paint faces on their pumpkins freehand or use templates and there are those who go to great lengths to carve their pumpkins by scraping and basically sculpting an image. For most of us, we find an appropriate template to use to guide us through the process and to the finished result.

Scary faces are popular and some not so scary. These are the easiest and the most traditional, since I’m into traditions.

Here’s one you may enjoy.


demented-face-pumpkin-carving-pattern

Image and Free Template Courtesy of http://www.celebating-halloween.com

Here’s the Free Printable

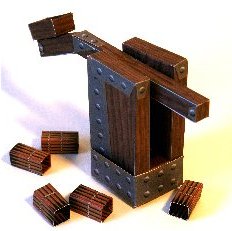
A Catapult You Can Make With Free Templates

This catapult is popular around my house. You can learn a lot about people when you have a few paper craft toys on the coffee table enticing your guests to play with them.

This one is great fun! It has a range of up to 10 feet. Be sure to make several so you can give them as gifts for your guests to take home. It’s always good to have a couple around just for fun. It can be addicting. I always want to see how many times I can hit my target in a row and then beat my last score.

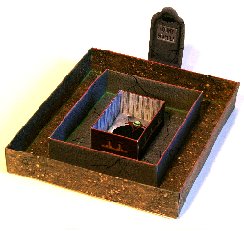
catapult1catapult2This is what you’ll get — a catapult and a target of a vampire grave plus a dozen bundles of stakes.

The images and free templates are compliments of http://www.ravensblight.com

I know you’re eager to get the instructions and free templates so you can begin playing:

Assembly Instructions

Catapult and Target

Print the assembly instructions on regular printer paper, but use a heavy card stock for the catapult, target and bundle of stakes. These are definitely going to get a workout.

Thanks for stopping by!